

[ad_1]
Within the earlier tutorial, we created an animated menu bar in SwiftUI. What if you wish to reuse the code in different initiatives? In fact, you may copy & paste the code from one challenge to a different however there’s a higher option to reuse the code by utilizing Swift Bundle.
Swift packages are reusable parts that builders can import of their initiatives. With Swift Bundle Supervisor, the built-in software for creating and managing Swift packages, you may simply share reusable code within the type of Swift packages.
On this tutorial, I’ll stroll you thru the method of making Swift packages and present you learn how to flip the code of the animated menu bar right into a reusable SwiftUI element.
Please word that I take advantage of Xcode 13 to create the demo code. Nevertheless, it is best to be capable to comply with procedures even if you’re utilizing a decrease model of Xcode.
Creating Swift Packages
There are two methods to create a Swift bundle. You possibly can both use command line or Xcode.
Utilizing Command Line
To create a Swift bundle utilizing command line, open Terminal and key within the following instructions:
|
mkdir AnimatedMenuBar cd AnimatedMenuBar swift bundle init |
The folder title is the bundle title. Right here, we use the title AnimatedMenuBar. When you hit the return key, you will note the next messages:
|
Creating library bundle: AnimatedMenuBar Creating Bundle.swift Creating README.md Creating .gitignore Creating Sources/ Creating Sources/AnimatedMenuBar/AnimatedMenuBar.swift Creating Exams/ Creating Exams/AnimatedMenuBarTests/ Creating Exams/AnimatedMenuBarTests/AnimatedMenuBarTests.swift |
This generates the essential skeleton of the Swift bundle together with the supply and checks. You possibly can additional edit README.md file to supply an outline of the bundle. Bundle.swift is the manifest file which defines the bundle’s title and its contents utilizing the PackageDescription module.
|
1 2 3 4 5 6 7 8 9 10 11 12 13 14 15 16 17 18 19 20 21 22 23 24 25 26 27 28 |
// swift-tools-version:5.3 // The swift-tools-version declares the minimal model of Swift required to construct this bundle.
import PackageDescription
let bundle = Bundle( title: “AnimatedMenuBar”, merchandise: [ // Products define the executables and libraries a package produces, and make them visible to other packages. .library( name: “AnimatedMenuBar”, targets: [“AnimatedMenuBar”]), ], dependencies: [ // Dependencies declare other packages that this package depends on. // .package(url: /* package url */, from: “1.0.0”), ], targets: [ // Targets are the basic building blocks of a package. A target can define a module or a test suite. // Targets can depend on other targets in this package, and on products in packages this package depends on. .target( name: “AnimatedMenuBar”, dependencies: []), .testTarget( title: “AnimatedMenuBarTests”, dependencies: [“AnimatedMenuBar”]), ] ) |
Notice that the bundle manifest should start with the string // swift-tools-version:, adopted by a model quantity equivalent to // swift-tools-version:5.3.
Utilizing Xcode
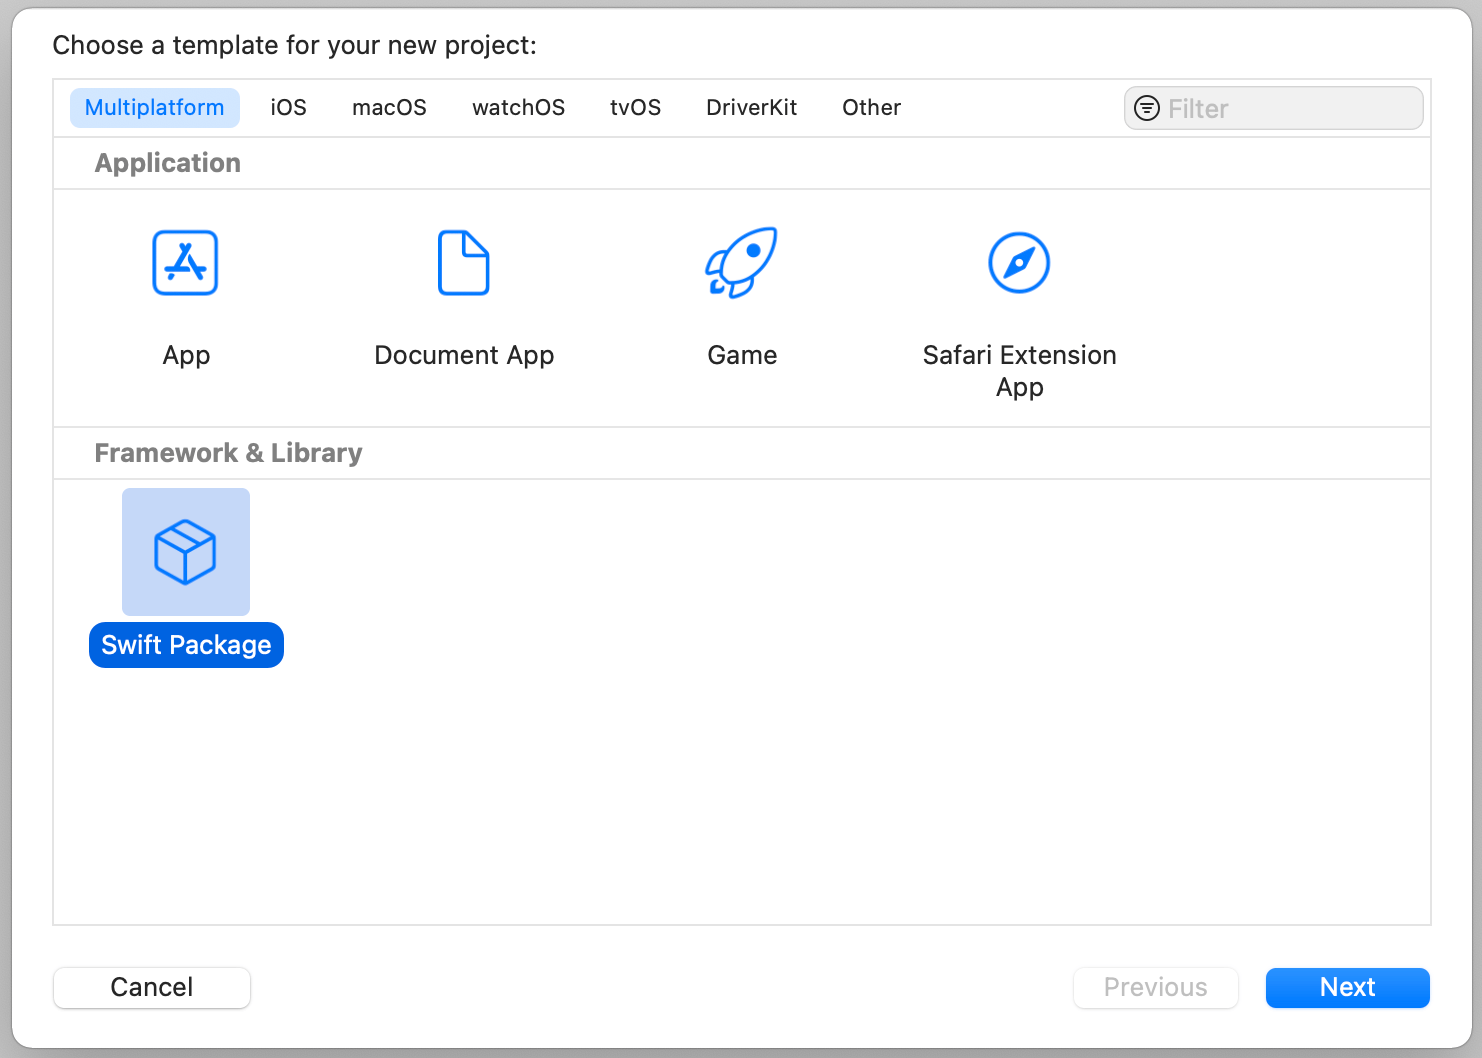
In case you favor to make use of Xcode to create the bundle, you may select File > New > Challenge… and choose Swift Bundle underneath Multiplatform.
Updating the Supply
The AnimatedMenuBar.swift file underneath the Sources folder solely accommodates the default content material generated by Xcode:
|
public struct AnimatedMenuBar { public personal(set) var textual content = “Hi there, World!”
public init() { } } |
It’s important to replace the file with the code for creating the animated menu bar. On this case, we reuse the code that now we have walked you thru within the earlier tutorial.
|
1 2 3 4 5 6 7 8 9 10 11 12 13 14 15 16 17 18 19 20 21 22 23 24 25 26 27 28 29 30 31 32 33 34 35 36 37 38 39 40 41 42 43 44 45 46 47 48 |
import SwiftUI
@out there(iOS 14, macOS 11.0, *) public struct AnimatedMenuBar: View { @Binding var selectedIndex: Int @Namespace personal var menuItemTransition
var menuItems = [ “Travel”, “Nature”, “Architecture” ]
public init(selectedIndex: Binding<Int>, menuItems: [String] = [ “Travel”, “Nature”, “Architecture” ]) { self._selectedIndex = selectedIndex self.menuItems = menuItems }
public var physique: some View {
HStack { Spacer()
ForEach(menuItems.indices) { index in
if index == selectedIndex { Textual content(menuItems[index]) .padding(.horizontal) .padding(.vertical, 4) .background(Capsule().foregroundColor(Colour.purple)) .foregroundColor(.white) .matchedGeometryEffect(id: “menuItem”, in: menuItemTransition) } else { Textual content(menuItems[index]) .padding(.horizontal) .padding(.vertical, 4) .background(Capsule().foregroundColor(Colour( pink: 244, inexperienced: 244, blue: 244))) .onTapGesture { selectedIndex = index } }
Spacer() }
} .body(minWidth: 0, maxWidth: .infinity) .padding() .animation(.easeInOut, worth: selectedIndex)
} } |
For Swift bundle, the AnimatedMenuBar struct is required to set to public. And we have to create a customized init with public entry stage.
Besides that, the remainder of the code is nearly the identical. Chances are you’ll discover one other distinction that we use the @out there attribute to annotate the struct with availability info. The road of code signifies that the struct is barely out there for iOS 14 and macOS 11.0 (or later).
Modifying Take a look at Code
By default, Xcode generates a check folder so that you can embrace automated checks. You possibly can modify the generated file named AnimatedMenuBarTests.swift to incorporate your check code. Nevertheless, for this demo, we aren’t going to jot down the code. You possibly can simply remark out the next line of code:
|
// XCTAssertEqual(AnimatedMenuBar().textual content, “Hi there, World!”) |
Including Dependencies (Non-compulsory)
Although this bundle doesn’t rely upon different Swift packages, you may edit the dependencies part to incorporate your dependent packages should you want:
|
dependencies: [ .package(url: “https://url/to/dependency”, from: 1.0.0) ], |
Including Supported Platforms
Whereas Swift packages are supposed to supply multiplatform help, you need to use the platforms attribute in Bundle.swift if the bundle solely helps a sure platform. Right here is an instance:
|
platforms: [ .iOS(.v14), .macOS(.v11) ], |
For this demo bundle, it’s out there for iOS 14 and macOS 11.0 (or later).
Publishing the Bundle on GitHub
After you made all of the adjustments, it is best to be capable to construct your bundle to make use of it domestically. To additional share the bundle with builders in your staff or neighborhood, you may publish the bundle on GitHub.
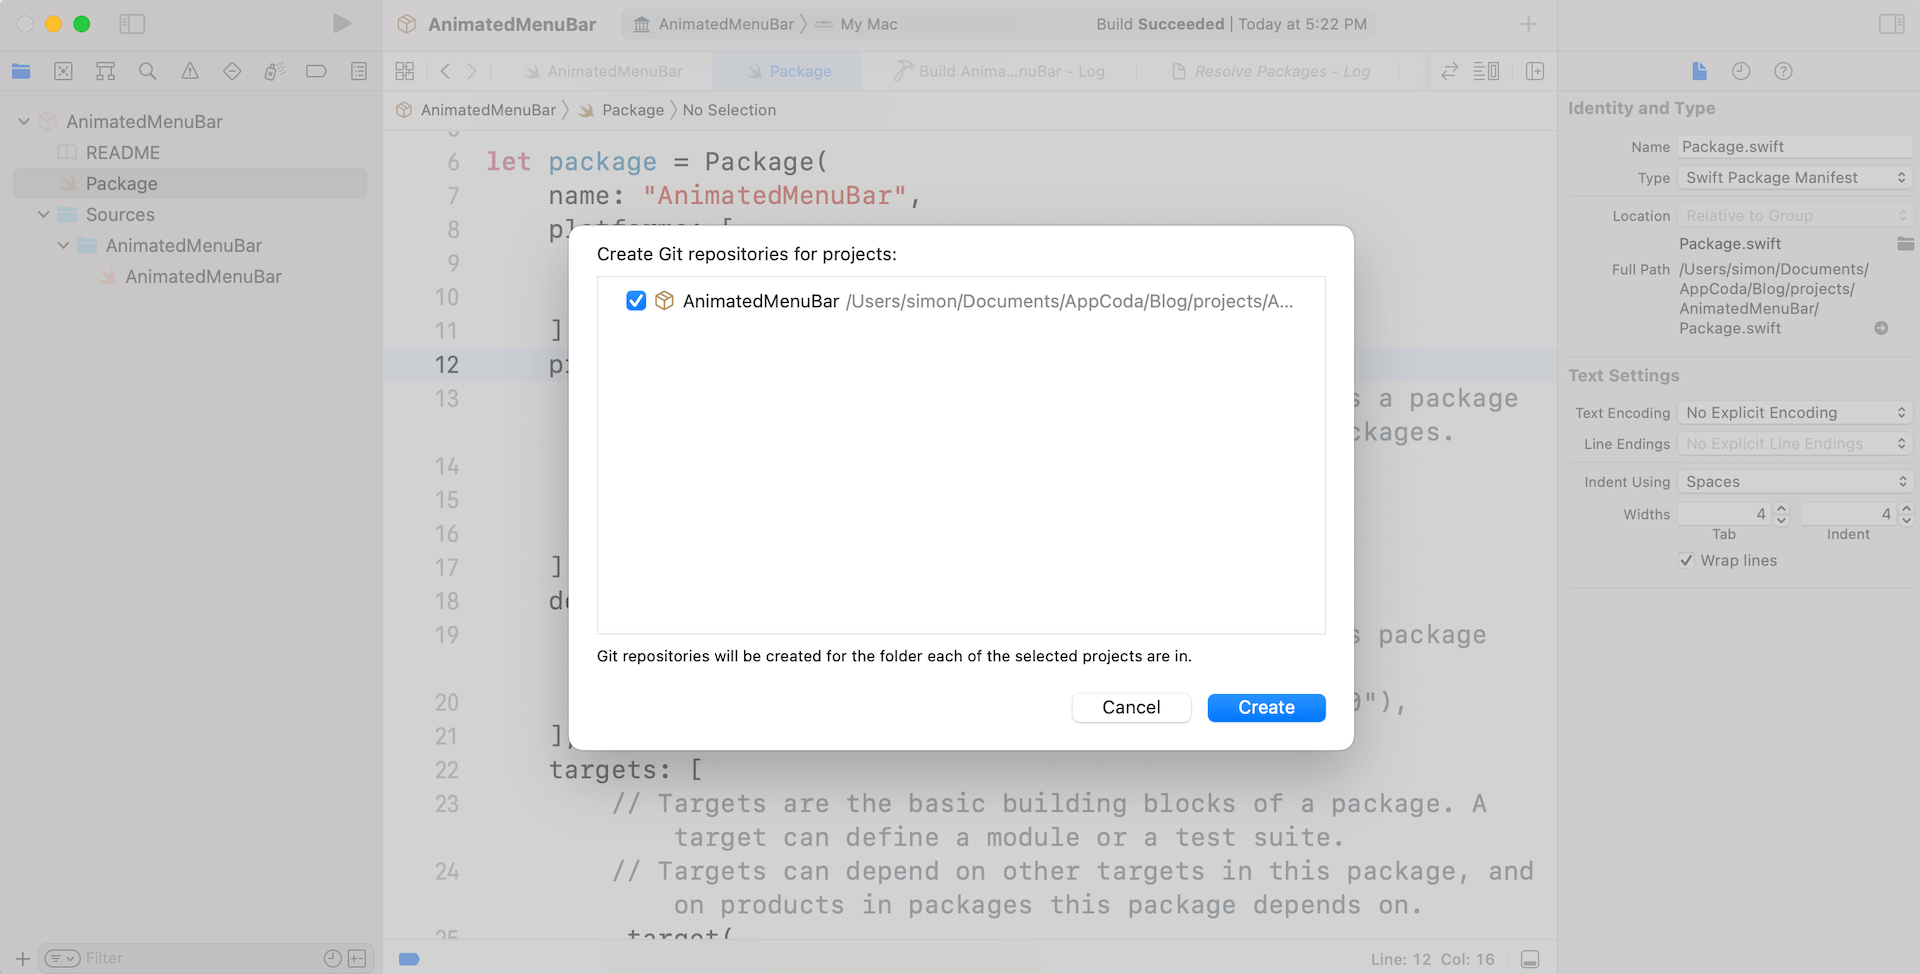
Go as much as the Xcode menu and select Supply Management > New Git Repositories… to create a brand new respository.
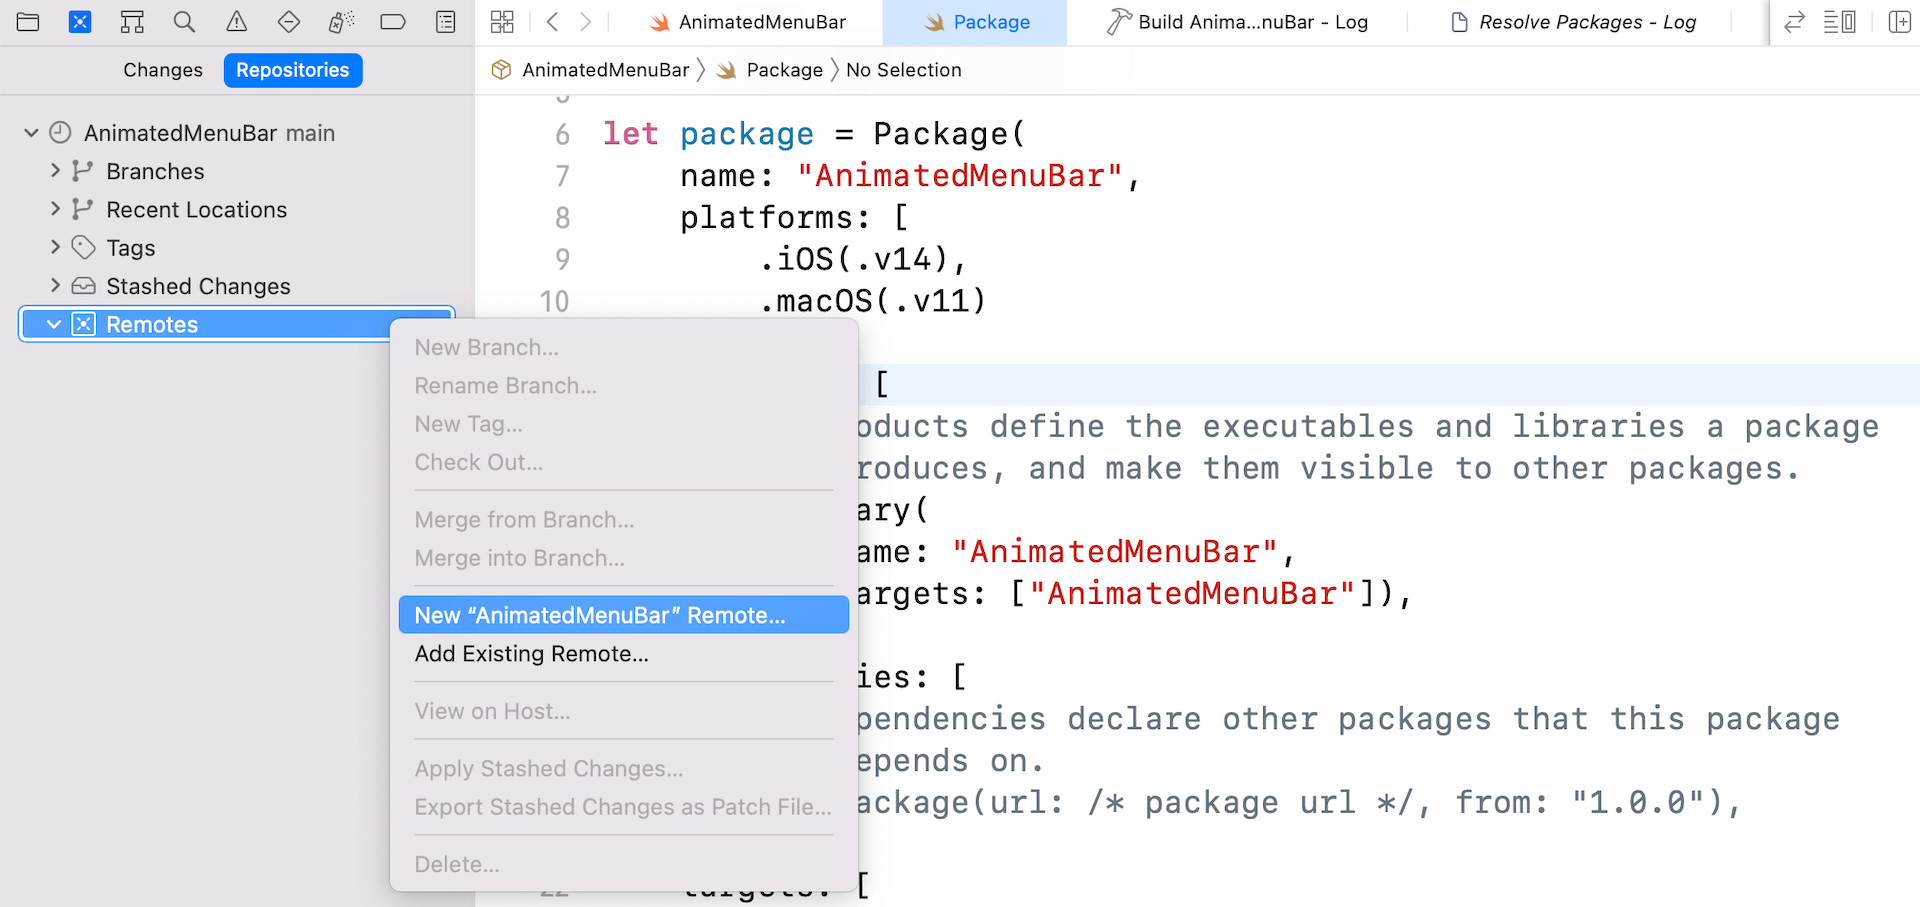
Subsequent, swap over to the Supply Management Navigator. Proper click on Remotes and select New “AnimatedMenuBar ” Distant…
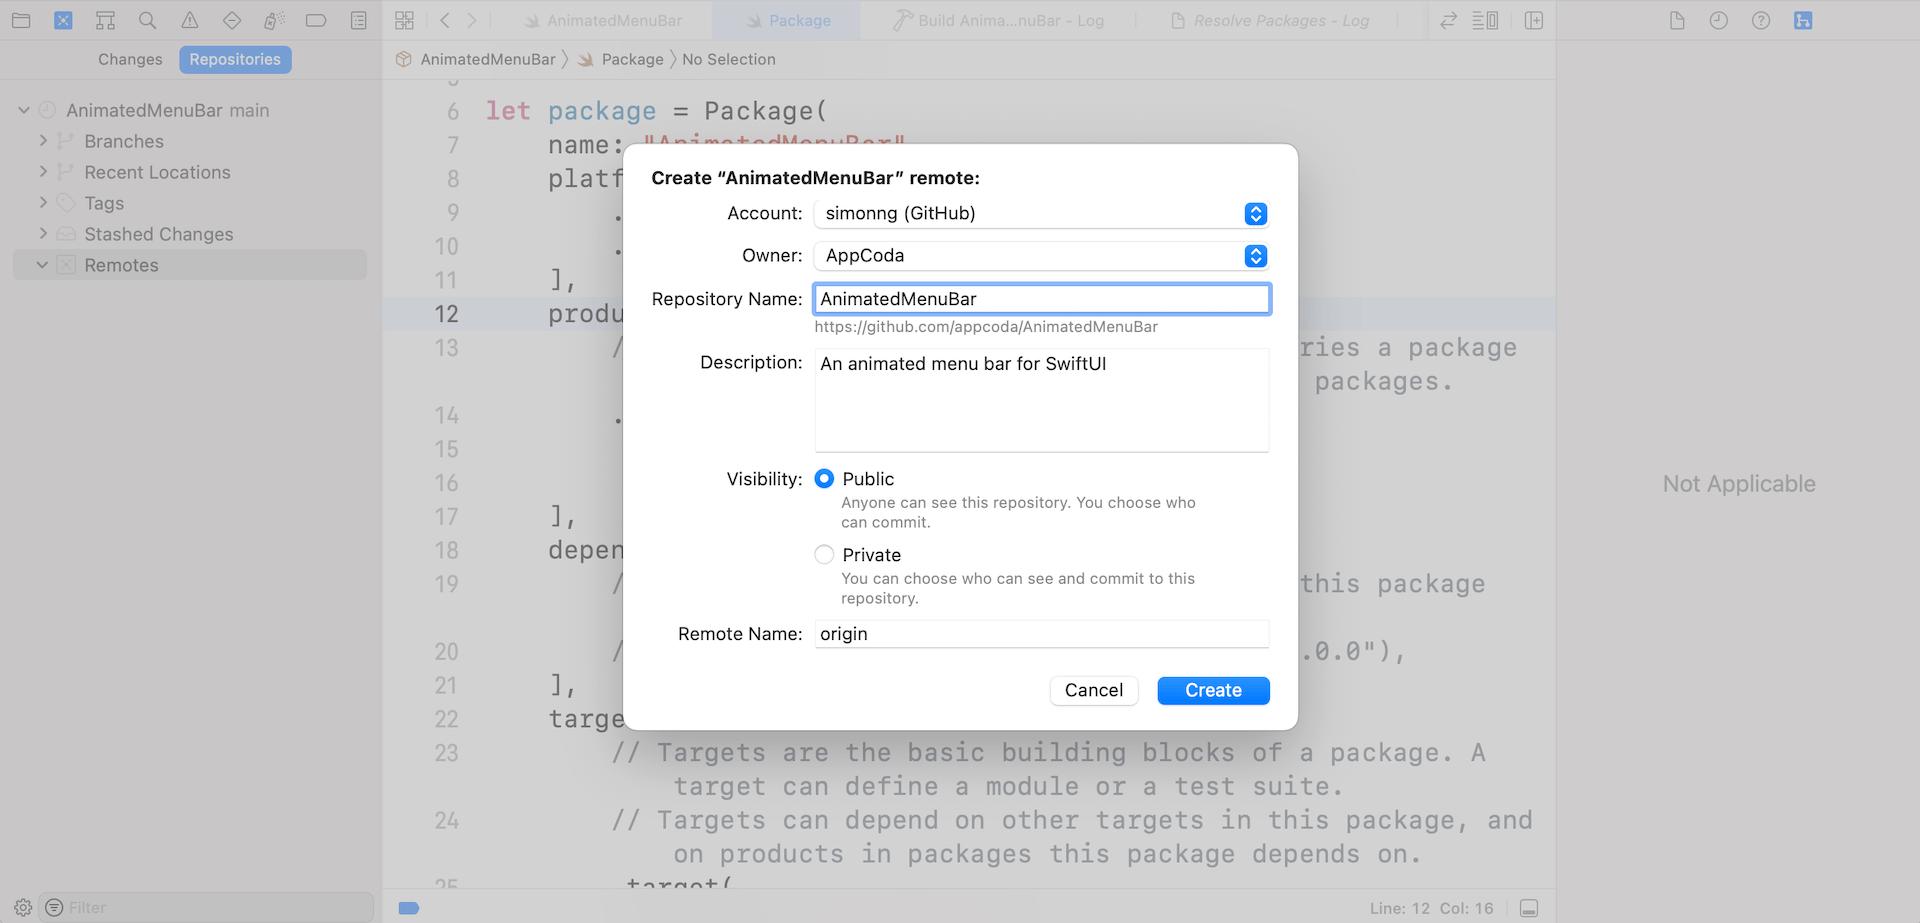
Assuming you’ve already configured your GitHub account in Xcode, it is best to be capable to create a distant repository. Set the repository title to AnimatedMenuBar and key in your description of the bundle. Relying in your choice, you can also make the bundle out there to public or simply maintain it to your personal challenge. For this demo, I set it to public.
When you hit the Create button, Xcode will create the repository on GitHub and add the native recordsdata to the repository.
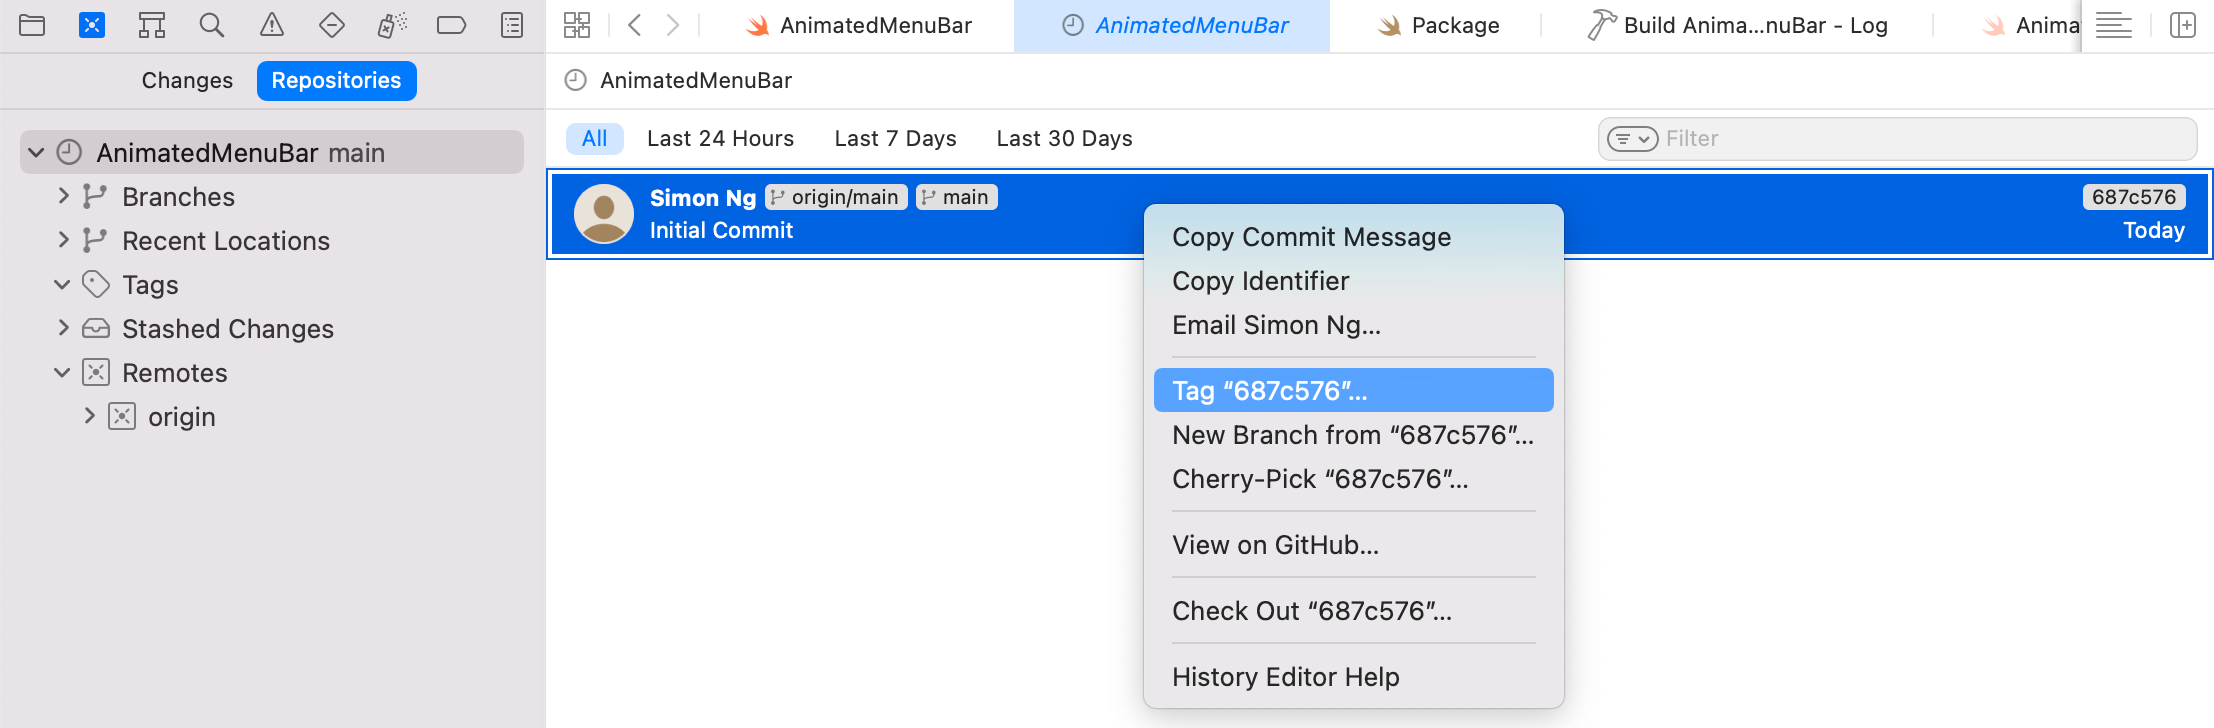
Presently, the bundle is just not assigned with a model quantity. To set a model for the bundle, go to the Supply Management Navigator. Proper click on the entry of the preliminary commit and select Tag.
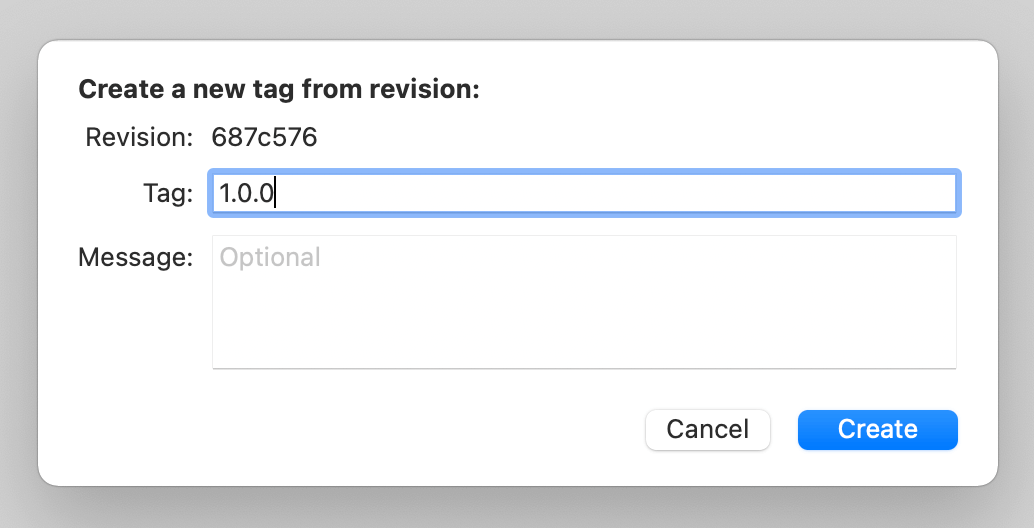
Subsequent, set the tag to 1.0.0 and click on Create to substantiate the change.
The change you simply made is barely out there domestically. To set the tag on the distant repository, it’s essential push the adjustments. Go as much as the Xcode menu, select Supply Management > Push. Please ensure you tick the Embody tags checkbox earlier than hitting the Push button.

That’s it! You’ve efficiently printed the Swift bundle onto GitHub. And, it’s accessible by way of https://github.com/appcoda/AnimatedMenuBar.
Utilizing Swift Bundle
To make use of the Swift bundle in any Xcode challenge, select File > Add Bundle… and key within the bundle URL within the search bar.
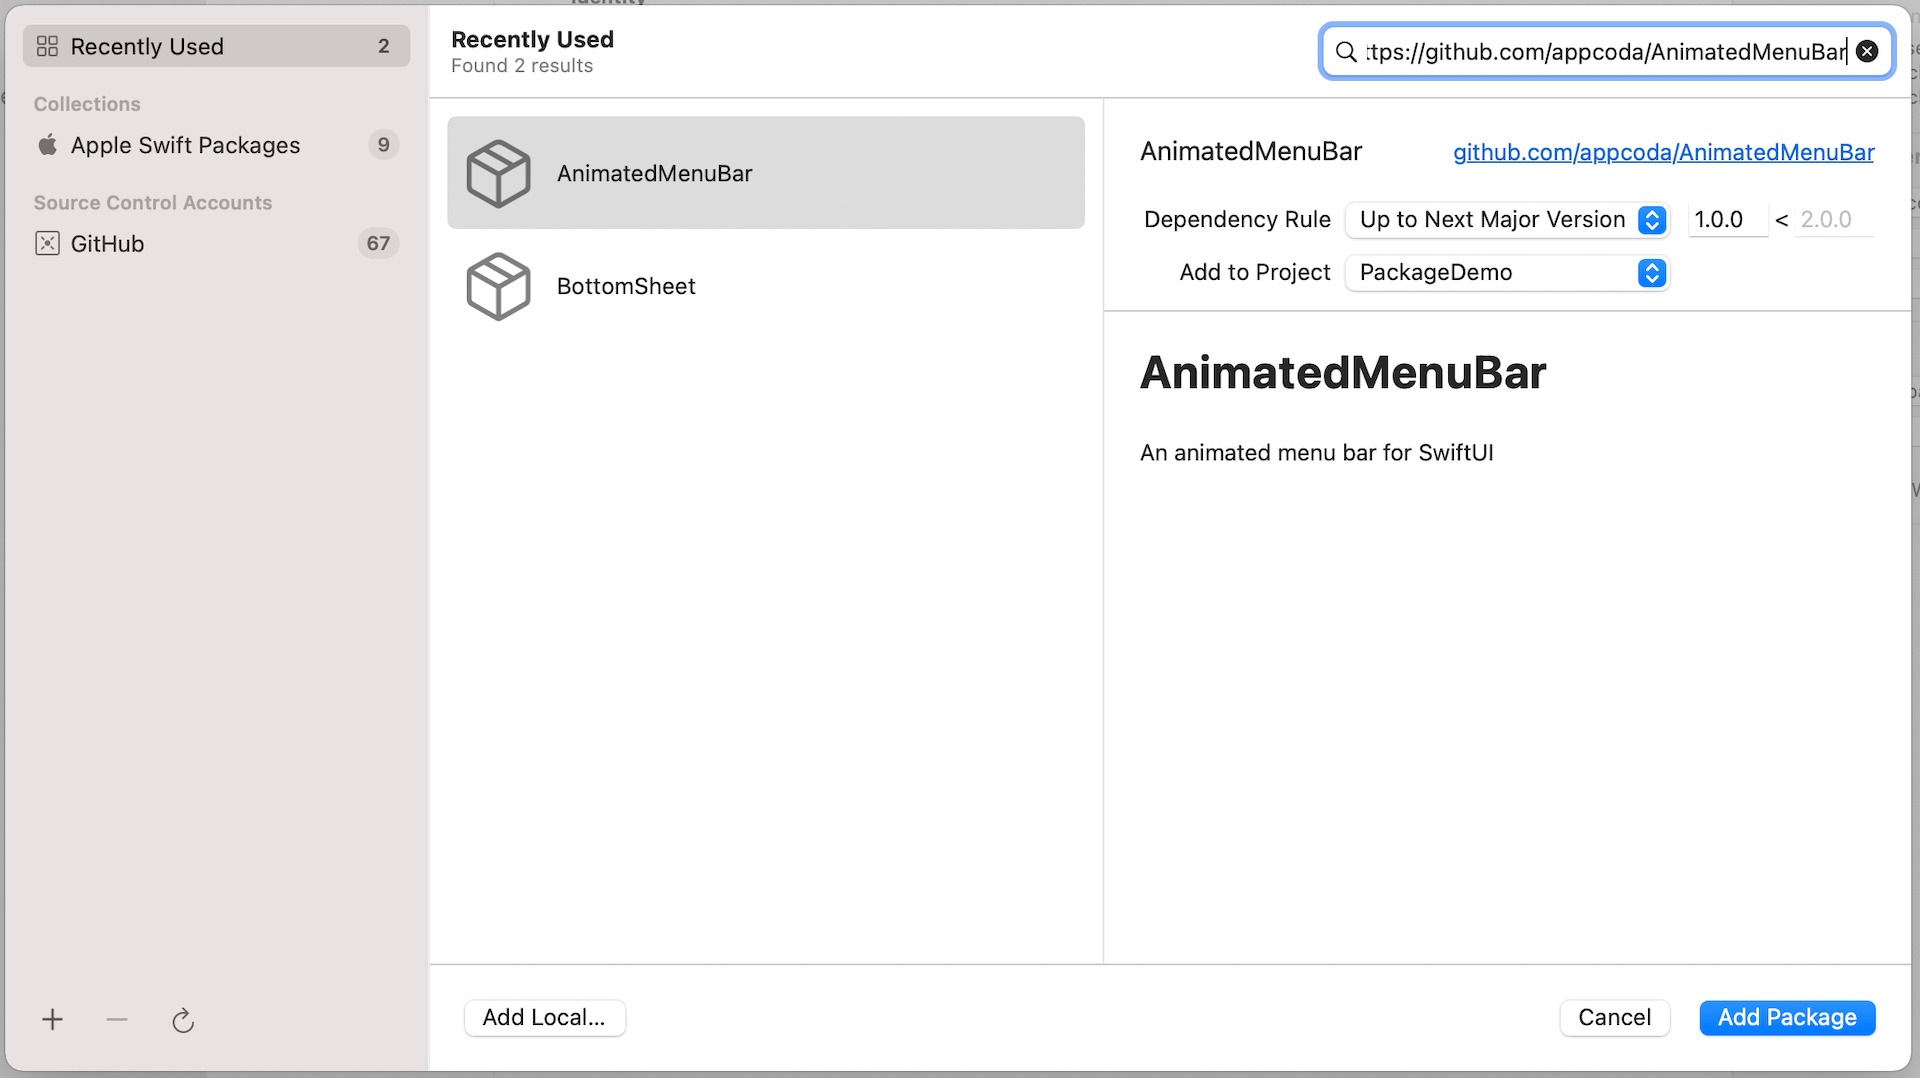
Xcode ought to then present you the bundle description and model. Click on Add Bundle to obtain and add the bundle to your challenge.
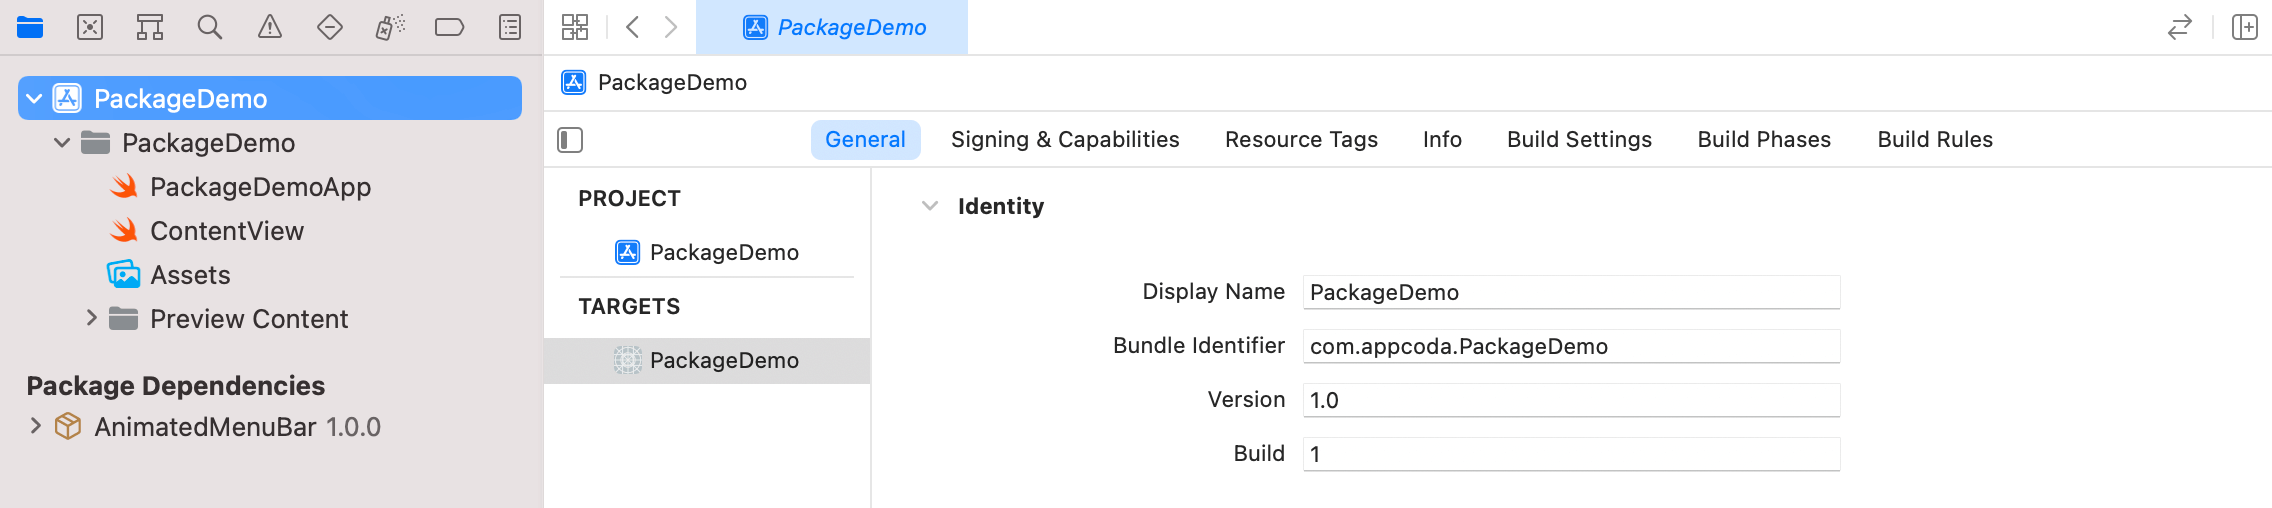
As soon as the bundle is downloaded, it is best to see the bundle underneath Bundle Dependencies within the challenge navigator. Now you might be prepared to make use of the AnimatedMenuBar view within the challenge.
All it’s essential do is import the AnimatedMenuBar bundle and use the AnimatedMenuBar view like this:
|
import SwiftUI import AnimatedMenuBar
struct ContentView: View { @State var tabIndex = 0
var physique: some View { AnimatedMenuBar(selectedIndex: $tabIndex) } } |
Abstract
On this tutorial, I’ve walked you thru the steps to create a Swift bundle for reusing some widespread SwiftUI views. The method shouldn’t be restricted to the reuse of SwiftUI views. You possibly can apply it to widespread parts that may be shared between groups and initiatives.
What do you concentrate on Swift packages? Have you ever used Swift Bundle Supervisor to create shareable parts? Please go away me remark and let me know.
[ad_2]