

[ad_1]

|
Through the years, we now have given you a succession of more and more highly effective instruments that can assist you migrate your information to the AWS Cloud. Beginning with AWS Import/Export again in 2009, adopted by Snowball in 2015, Snowmobile and Snowball Edge in 2016, and Snowcone in 2020, every new machine has given you further options to simplify and expedite the migration course of. All the units are designed to function in environments that undergo from community constraints corresponding to restricted bandwidth, excessive connections prices, or excessive latency.
Offline Tape Migration
Right this moment, we’re taking one other step ahead by making it simpler so that you can migrate information saved offline on bodily tapes. You may eliminate your giant and costly storage facility, ship your tape robots out to pasture, and get rid of all the time & effort concerned in transferring archived information to new codecs and mediums each few years, all whereas retaining your current tape-centric backup & restoration utilities and workflows.
This launch brings a tape migration functionality to AWS Snowball Edge units, and means that you can migrate as much as 80 TB of knowledge per machine, making it appropriate in your petabyte-scale migration efforts. Tapes may be saved within the Amazon S3 Glacier Versatile Retrieval or Amazon S3 Glacier Deep Archive storage courses, after which accessed from on-premises and cloud-based backup and restoration utilities.
Again in 2013 I confirmed you Create a Digital Tape Library Utilizing the AWS Storage Gateway. Right this moment’s launch builds on that functionality in two other ways. First, you create a Digital Tape Library (VTL) on a Snowball Edge and replica your bodily tapes to it. Second, after your tapes are within the cloud, you create a VTL on a Storage Gateway and use it to entry your digital tapes.
Getting Began
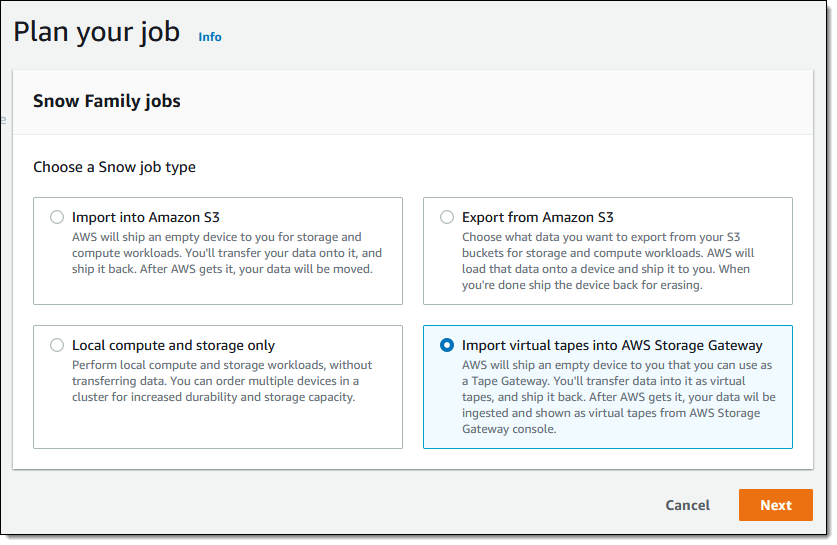
To get began, I open the Snow Household Console and create a brand new job. Then I choose Import digital tapes into AWS Storage Gateway and click on Subsequent:
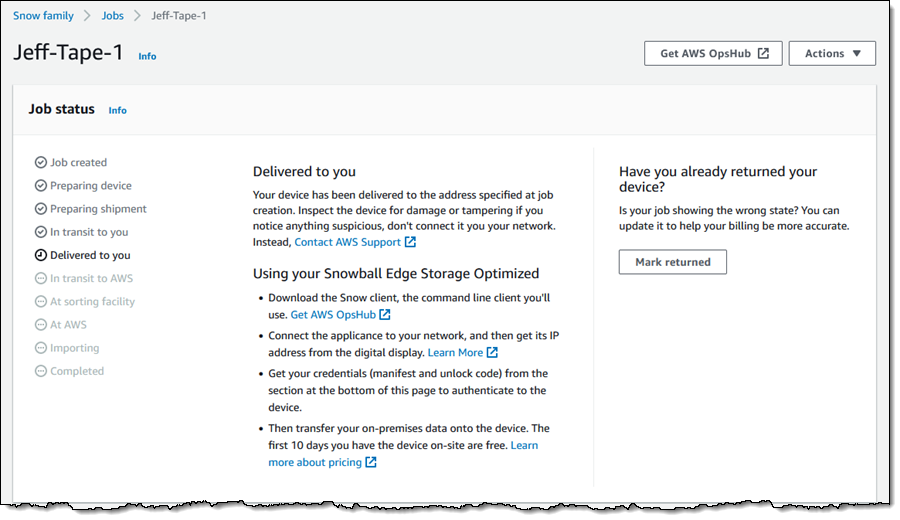
Then I’m going by way of the rest of the ordering sequence (enter my transport deal with, identify my job, select a KMS key, and arrange notification preferences), and place my order. I can observe the standing of the job within the console:
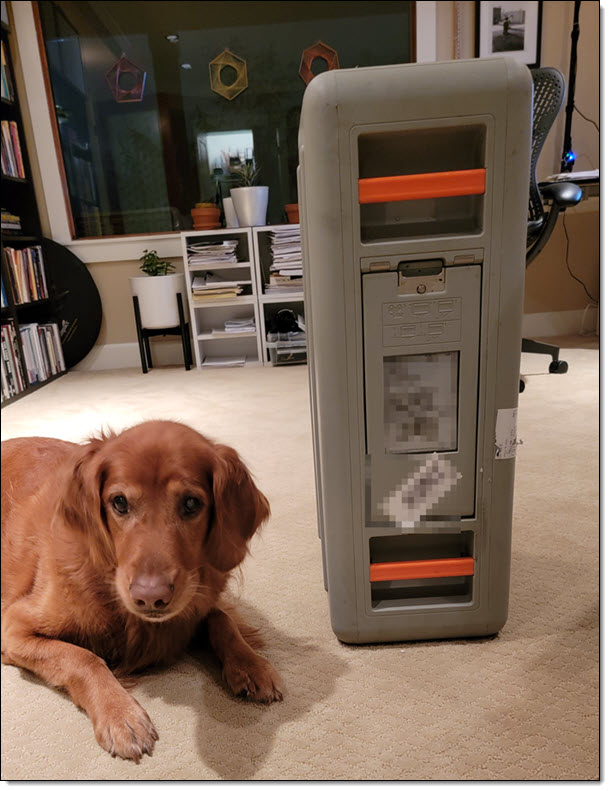
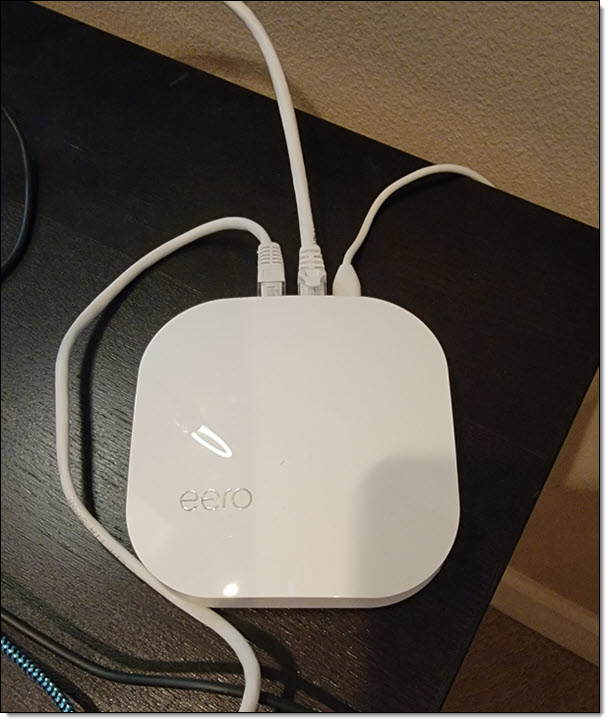
When my machine arrives I inform the considerably perplexed supply individual about information switch, carry it all the way down to my basement workplace, and ask Luna to test it out:
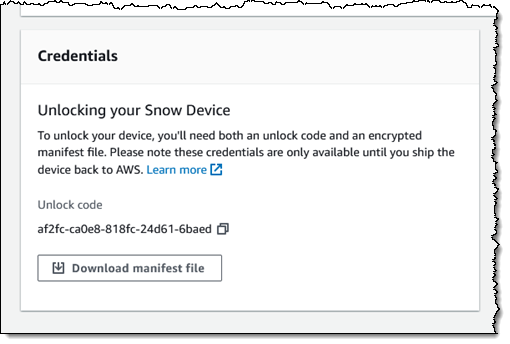
Again within the Snow Household console, I obtain the manifest file and replica the unlock code:
I join the Snowball Edge to my “company” community:
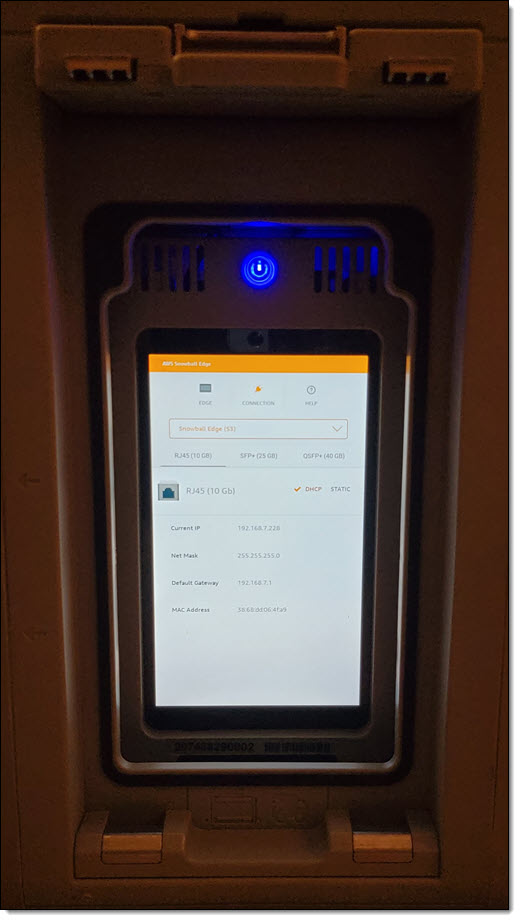
Then I set up AWS OpsHub for Snow Household on my laptop computer, energy on the Snowball Edge, and look forward to it to acquire & show an IP deal with:
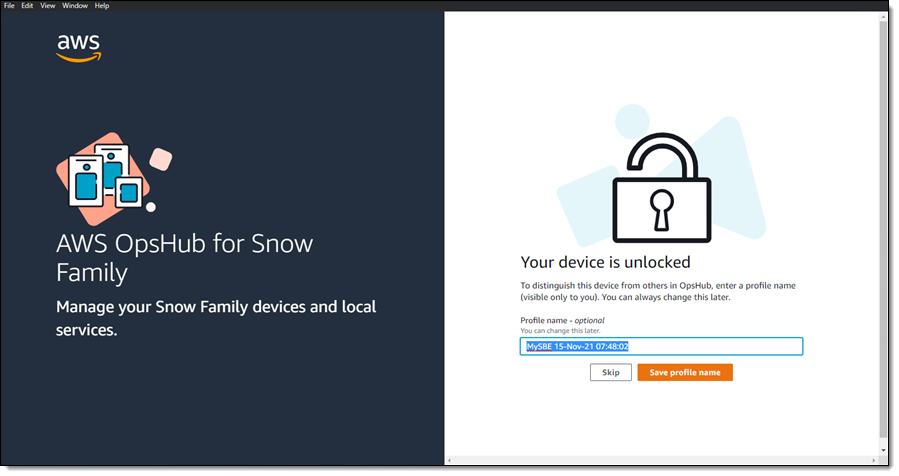
I launch OpsHub, check in, and settle for the default identify for my machine:
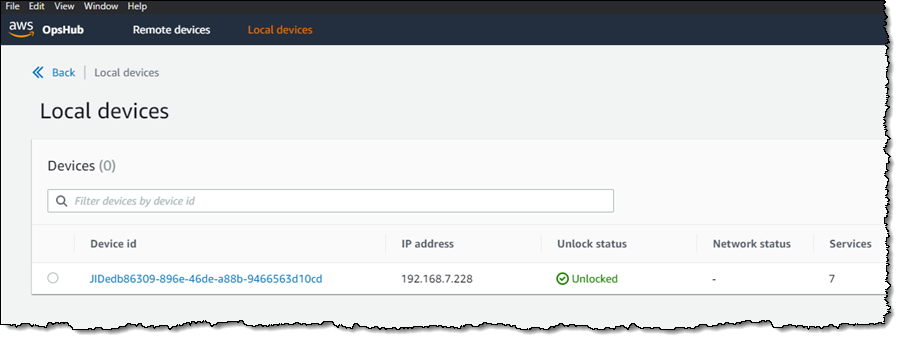
I affirm that OpsHub has entry to my machine, and that the machine is unlocked:
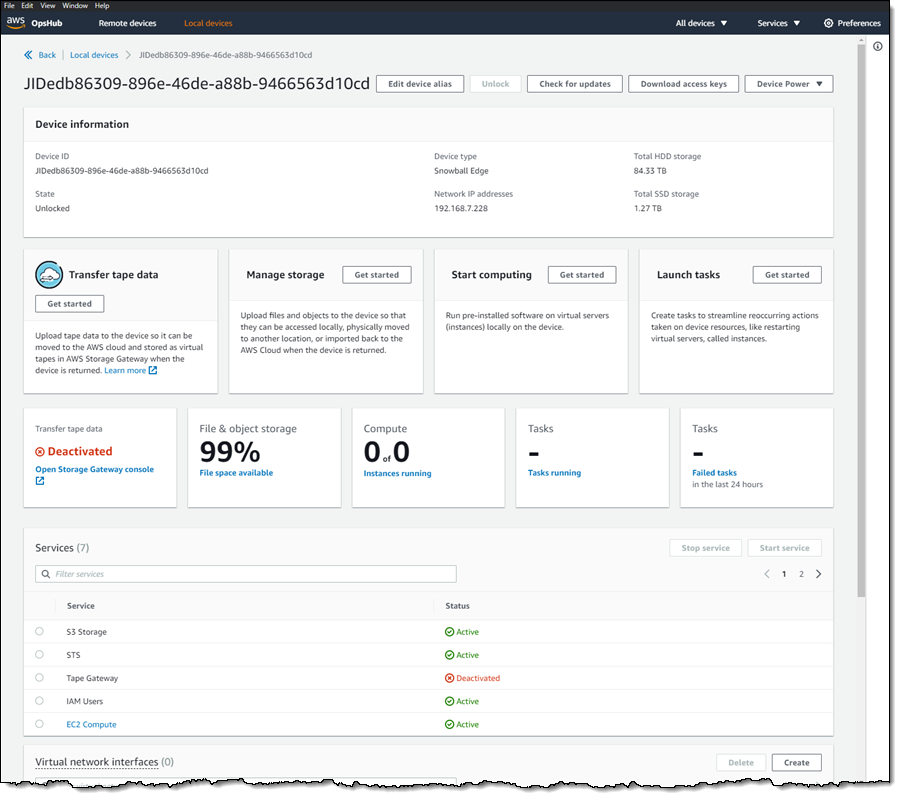
I view the record of companies working on the machine, and word that Tape Gateway just isn’t working:
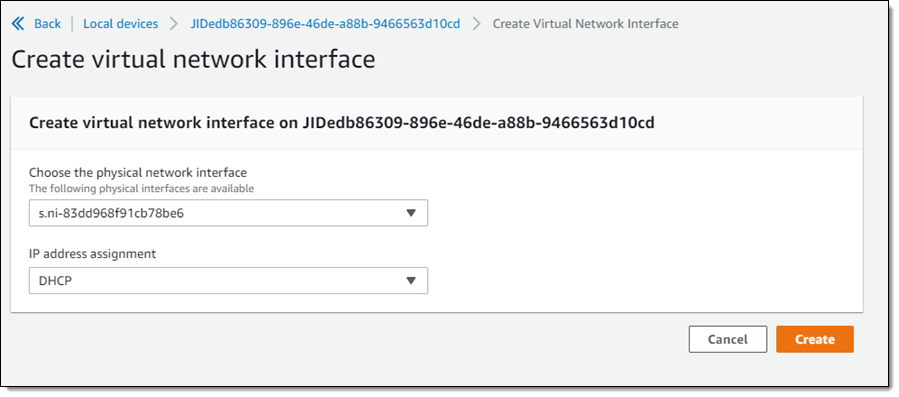
Earlier than I begin Tape Gateway, I create a Digital Community Interface (VNI):
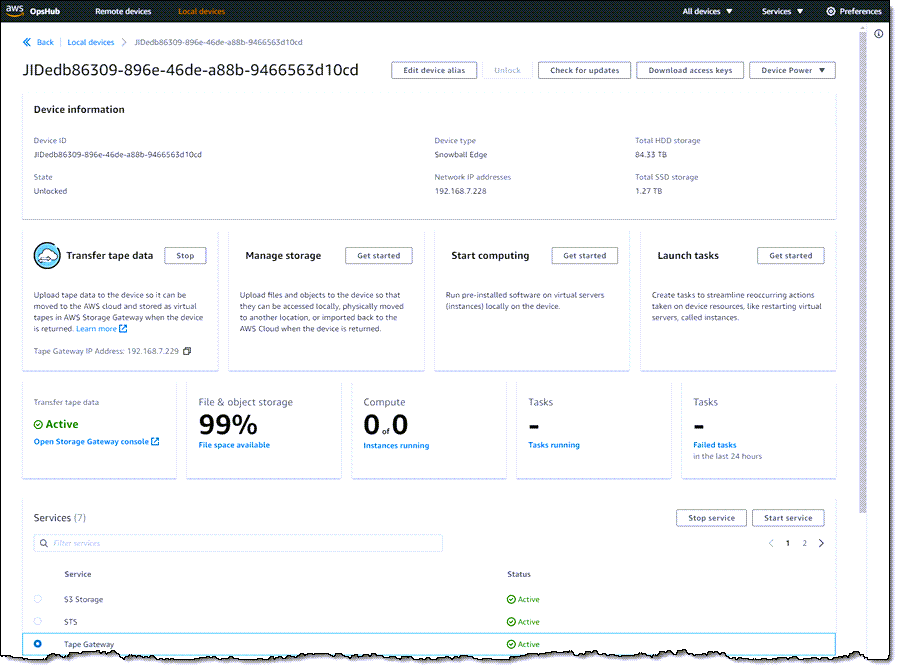
After which I begin the Tape Gateway service on the Snow machine:

Now that the service is working on the machine, I’m able to create the Storage Gateway. I click on Open Storage Gateway console from inside OpsHub:
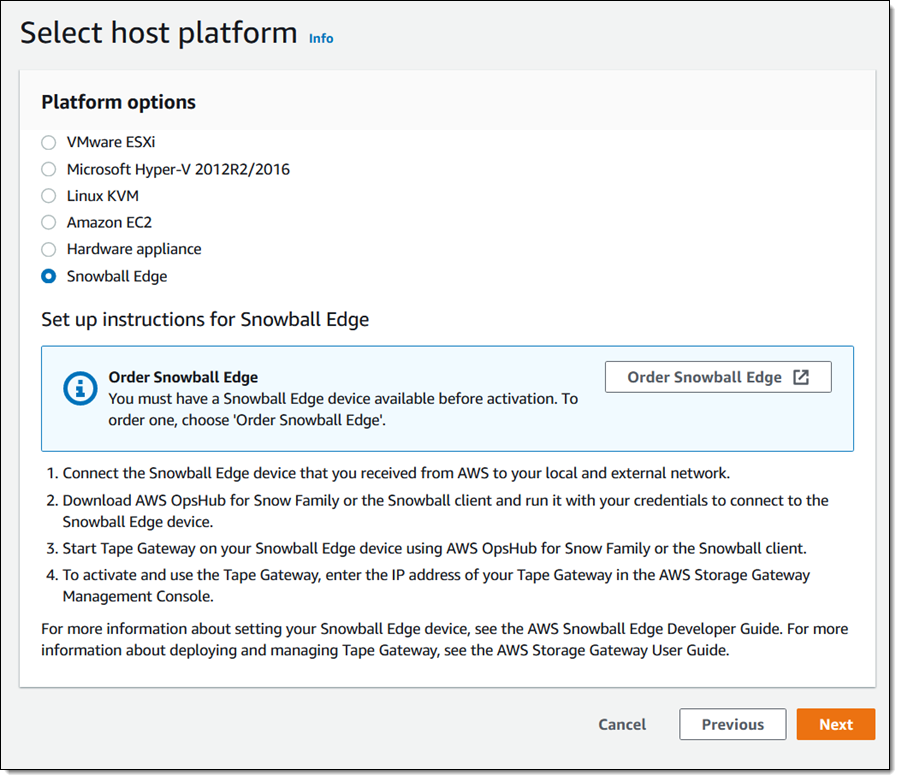
I choose Snowball Edge as my host platform:
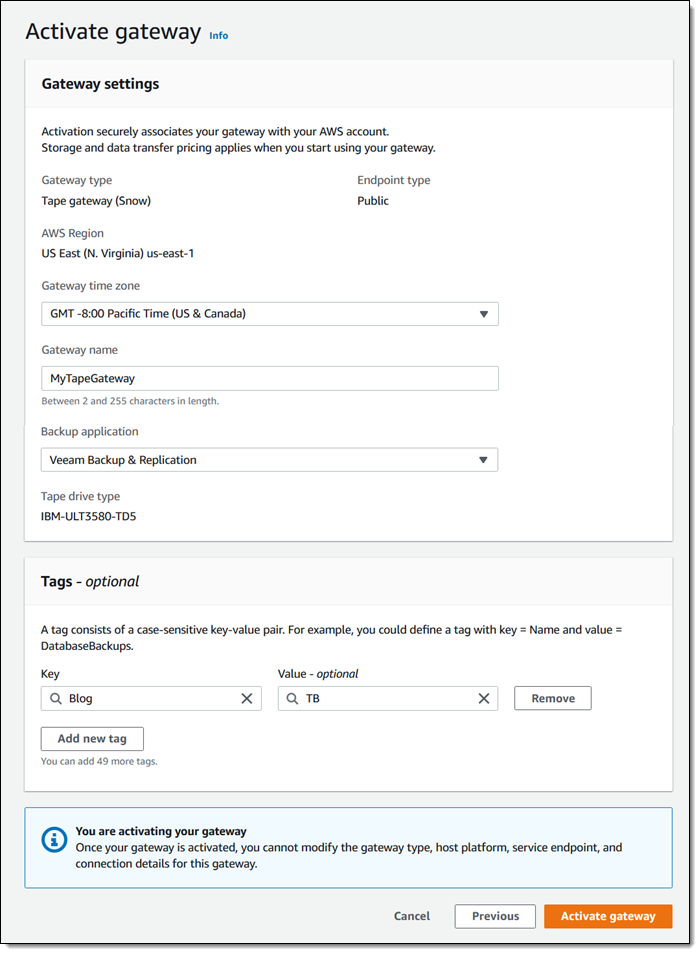
Then I give my gateway a reputation (MyTapeGateway), choose my backup utility (Veeam Backup & Replication on this case), and click on Activate Gateway:
Then I configure CloudWatch logging:

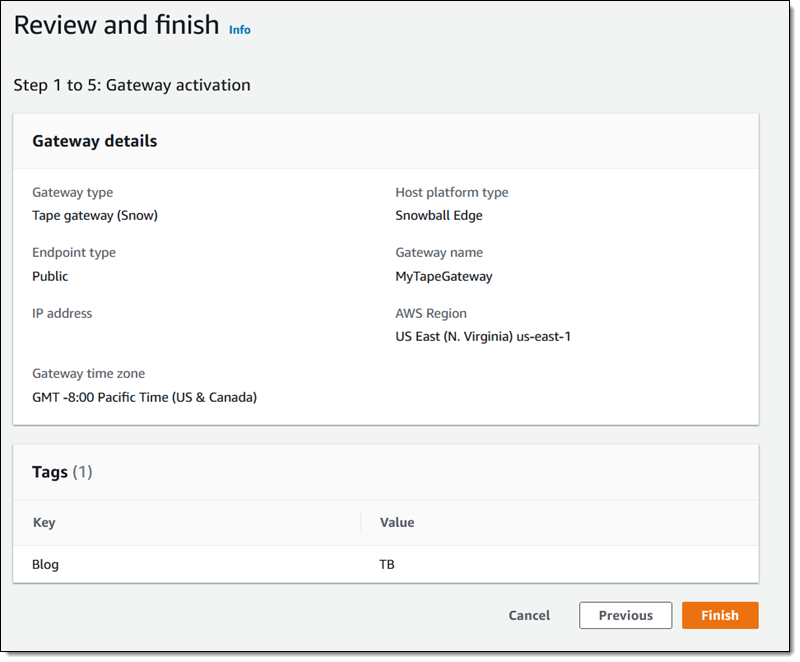
And at last, I evaluate the settings and click on End to activate my new gateway:
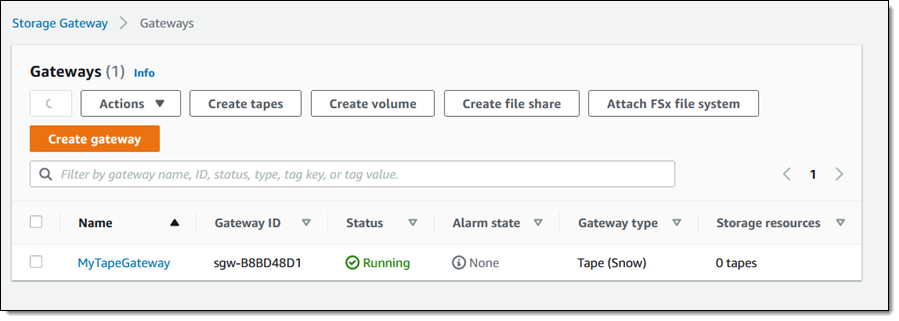
The activation course of takes a couple of minutes, simply sufficient time to take Luna for a fast stroll. Once I return, the console exhibits that the gateway is activated and working, and I’m all set:
Creating Tapes
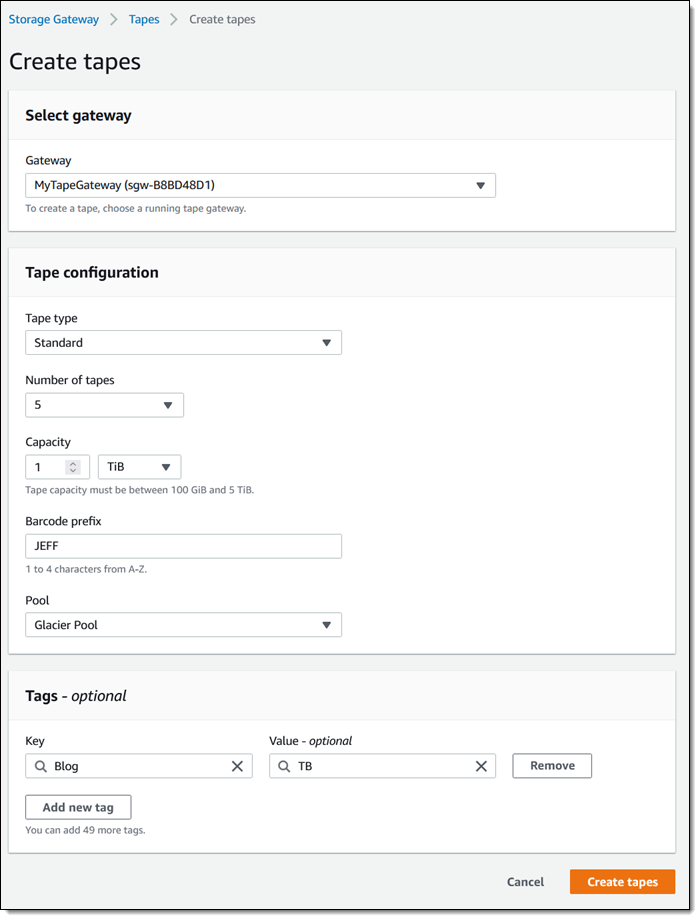
The subsequent step is to create some digital tapes. I click on Create tapes and enter the requested info, together with the pool (Deep Archive or Glacier), and click on Create tapes:
The subsequent step is to repeat information from my bodily tapes to the Snowball Edge. I don’t have a knowledge middle and I don’t have any tapes, so I can’t present you the way to do that half. The information is saved on the machine, and my Web connection is used just for administration visitors between the Snowball Edge machine and AWS. To be taught extra about this a part of the method, take a look at our new animated explainer.
After I’ve copied the specified tapes to the machine, I put together it for cargo to AWS. I ensure that all the digital tapes within the Storage Gateway Console have the standing In Transit to VTS (Digital Tape Shelf), after which I energy down the machine.
The show on the machine updates to indicate the transport deal with, and I look forward to the transport firm to choose up the machine.
When the machine arrives at AWS, the digital tapes are imported, saved within the S3 storage class related to the pool that I selected earlier, and may be accessed by retrieving them utilizing a web based tape gateway. The gateway may be deployed as a digital machine or a {hardware} equipment.
Now Obtainable
You need to use AWS Snowball Edge for offline tape migration within the US East (N. Virginia), US East (Ohio), US West (Oregon), US West (N. California), Europe (Eire), Europe (Frankfurt), Europe (London), Asia Pacific (Sydney) Areas. Begin migrating petabytes of your bodily tape information to AWS, at the moment!
— Jeff;
[ad_2]