

[ad_1]
In my earlier weblog, we talked about the advantages that Cloud Native applied sciences convey to microservice software program improvement. And, how APIClarity provides us higher visibility into how and when our APIs are being utilized.
On this article, we’re going to present you an instance of how we’re using GitLab CI/CD with Kubernetes, Istio, and APIClarity to deploy a pattern microservices app and management the lifecycle administration of our pattern software.
PreReqs:
- GitLab cloud or non-public deployment
- Kubernetes Cluster
- Have the ability to use NodePorts out of your Kubernetes Cluster
- GitLab agent and runner in your Kubernetes Cluster for CI/CD
Let’s get began
First we have to clone the pattern app repo from GitHub to our GitLab repo.
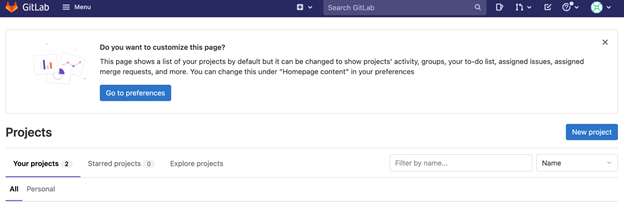
- Login to GitLab together with your person creds
- Click on the “New Challenge” button. (Should you’re a primary time person, click on the “Create Challenge” button.)
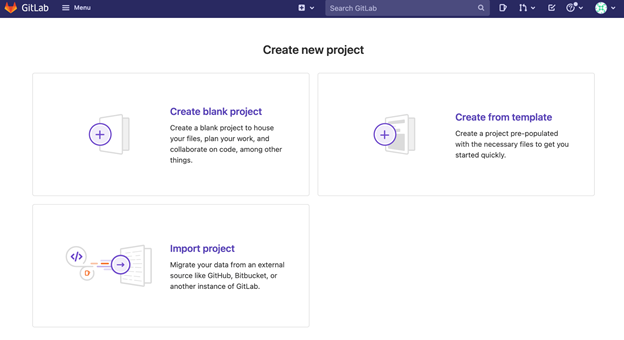
- Click on the repo by URL button

- Copy the URL, https://github.com/CiscoDevNet/microservices-demo, to the “Git repository URL” discipline
- Rename the challenge and slug and alter the visibility degree as desired to your preferences. For the needs of this app, I can’t change any of that data.
- Click on Create Challenge

As soon as that’s performed we’re going to make a small change to the README.md file in Gitlab to kick off the set up.
- Navigate to the README.md file. To get to the README.md file click on Repository on the left Panel, then click on Information, and within the file listing click on the road with README.md. From there you’ll be able to click on the Edit button. You may also navigate to the URL for the README.md file by modifying and utilizing the next URL https://<gitlab-domain>/<username-or-organization-name>/microservices-demo/~/edit/grasp/README.md

- Add a line with some textual content on the backside of the edit part after which click on “Commit modifications”.
- Navigate to the pipeline to your new deployment instance: https://gitlab.instance.com/root/microservices-demo/-/pipelines
- Click on both the place it says Pending or Working after which click on the place it says deploy.
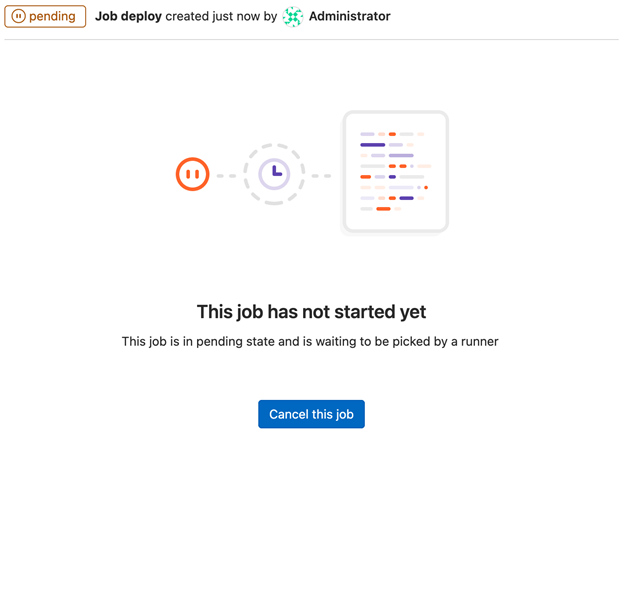
It is best to see the output the place it’s deploying APIClarity and the demo microservice challenge that APIClarity is monitoring. (As talked about within the necessities, Kubernetes and GitLab integration have to be configured earlier than finishing this tutorial.) It’ll look just like the next:

So, what’s Taking place?
The GitLab runner is checking if Istio is put in. If it isn’t, it can set up it. It then provides the namespaces for sock-shop and APIClarity, labels the sock-shop namespace for Istio, deploys sock-shop, deploys APIClarity after which updates the sock-shop deployment to funnel HTTP requests to APIClarity.
After the primary deployment, each time the code is up to date it can redeploy the app with the newest updates and replace APIClarity accordingly and as wanted.
Now let’s use APIClarity and the pattern app to generate some site visitors and look at the APIClarity outcomes.
- Utilizing an IP handle tied to a Kubernetes node go to http://<kube-node-ip>:30001 and click on/navigate across the web site to generate some site visitors on the backend HTTP API for the pattern app. (Perhaps add a number of socks to your cart ;).

- Subsequent subject the next command to convey up the APIClarity Dashboard.
```
kubectl port-forward -n apiclarity svc/apiclarity-apiclarity 9999:8080
```
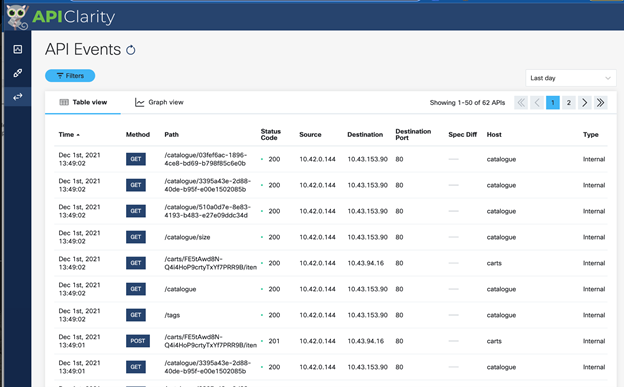
- Then in your browser go to http://localhost:9999 or http://127.0.0.1:9999 to take a look at APIClarity Dashboard.
Since you will have simply generated some site visitors, I might advocate switching the time interval from the final day to the final 5 minutes to raised see the site visitors.
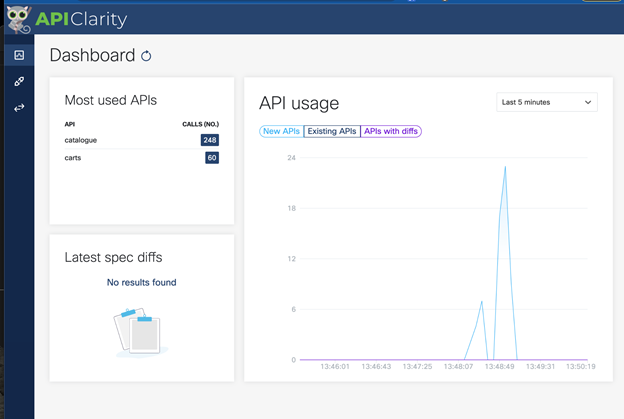
- On the left hand aspect click on the place it says “catalogue.” This could convey you right here…

- Lets then view the “Reconstructed” tab

- Then click on the place it says “Assessment”. It’ll look just like beneath. From there you’ll be able to view APIClarity’s API spec.

Now, you will have a primary hand take a look at deploying APIClarity with GitLab CI/CD on Kubernetes and an intro look into a few of what APIClarity gives. Please try the positioning and docs https://apiclarity.io/, checkout the GitHub repo, https://github.com/APIClarity/APIClarity. Additionally, checkout this text on a few of the why’s of utilizing APIClarity <hyperlink to “Bringing Readability to APIs on Cloud Native Applied sciences with APIClarity”>.
Should you actually wish to take it additional you’ll be able to make the most of this repo, the place we’re constructing a personal Kubernetes cluster utilizing k3s and GitLab from scratch after which working by the identical course of as we used on this article to deploy our pattern app with GitLab CI/CD.
Sources to get began with APIClarity
- Watch the brief Snack Minute movies to see how one can handle a number of APIs with the new open supply API observability device APIClarity
- Take a look at the positioning and docs
- Checkout the Github repo
Take a look at the demo video beneath. You’ll see how APIClarity lets you monitor the API calls inside and out of doors your software service, and the way shortly you will get began with including APIClarity to your software deployment utilizing GitLab.
We’d love to listen to what you suppose. Ask a query or go away a remark beneath.
And keep related with Cisco DevNet on social!
Twitter @CiscoDevNet | Fb | LinkedIn
Go to the brand new Developer Video Channel
Share:
[ad_2]