

[ad_1]
Compose for Desktop is a UI framework that simplifies creating consumer interfaces for desktop apps. Google launched it in 2021. This contemporary toolkit makes use of Kotlin for creating quick reactive UIs with no XMLs or templating language. Additionally, by utilizing it, you’re in a position to share UI code between desktop and Android apps.
JetBrain’s builders created Compose for Desktop primarily based on Jetpack Compose for Android, however there are some issues that differ. For instance, you gained’t work with the Android lifecycle, Android ViewModels and even Android Studio.
For the mission, you’ll use Kotlin and IntelliJ IDEA to create an app that allows you to question climate knowledge for a particular metropolis on the planet.
On this tutorial, you’ll learn to:
- Mannequin your desktop app
- Use the Loading, Content material, Error (LCE) mannequin
- Publish your app
Getting Began
Obtain the starter mission by clicking Obtain Supplies on the prime or backside of the tutorial.
Import the starter mission into IntelliJ IDEA and run MainKt.

Then, you’ll see a easy Compose introduction display screen with one check Button.

On this particular mission, you have already got a knowledge supply — a repository that fetches free meteorological knowledge for a particular metropolis from WeatherAPI.com.
First, you have to register an account for WeatherAPI and generate a key. Upon getting the important thing, add it inside Most important.kt as the worth of API_KEY:
non-public const val API_KEY = "your_api_key_goes_here"
Subsequent, open Repository.kt, and also you’ll see the category is utilizing Ktor to make a community request to the endpoint, remodel the info and return the outcomes — all in a handy suspending perform. The outcomes are saved in a category, which you’ll must populate the UI.
It’s time to lastly dive into UI modeling.
Observe: If you happen to aren’t accustomed to this strategy otherwise you wish to dive extra into Ktor, take a look at the hyperlink to Ktor: REST API for Cell within the “The place to Go From Right here?” part.
Getting Person Enter
As step one, you have to get enter from the consumer. You’ll want a TextField to obtain the enter, and a Button to submit it and carry out the community name.
Create a brand new file within the SunnyDesk.major bundle and set its identify to WeatherScreen.kt. In that file, add the next code:
@Composable
enjoyable WeatherScreen(repository: Repository) {

}
Right here, you’re making a Composable perform and passing in repository. You’ll be querying WeatherAPI for the outcomes, so it is smart to have your knowledge supply useful.
Import the runtime bundle, which holds Composable, by including this line above the category declaration:
import androidx.compose.runtime.*
The subsequent step is organising the textual content enter. Add the next line inside WeatherScreen():
var queriedCity by keep in mind { mutableStateOf("") }
With this code, you create a variable that holds the TextField‘s state. For this line to work, you have to have the import for the runtime bundle talked about above.
Now, you may declare TextField itself with the state you simply created:
TextField(
    worth = queriedCity,
    onValueChange = { queriedCity = it },
    modifier = Modifier.padding(finish = 16.dp),
    placeholder = { Textual content("Any metropolis, actually...") },
    label = { Textual content(textual content = "Seek for a metropolis") },
    leadingIcon = { Icon(Icons.Crammed.LocationOn, "Location") },
)
Within the code above, you create an enter discipline that holds its worth in queriedCity. Additionally, you show a floating label, a placeholder and even an icon on the facet!
Then, add all vital imports on the prime of the file:
import androidx.compose.basis.format.*
import androidx.compose.materials.*
import androidx.compose.materials.icons.Icons
import androidx.compose.materials.icons.crammed.LocationOn
import androidx.compose.ui.*
import androidx.compose.ui.unit.dp
Now, you wish to create a Button that sits subsequent to TextField. To do this, you have to wrap the enter discipline in a Row, which helps you to have extra Composables on the identical horizontal line. Add this code to the category, and transfer the TextField declaration as follows:
Row(
  modifier = Modifier
    .fillMaxWidth()
    .padding(horizontal = 16.dp, vertical = 16.dp),
  verticalAlignment = Alignment.CenterVertically,
  horizontalArrangement = Association.Middle
) {
  TextField(...)
  // Button will go right here
}
Proper now, you may have a Row that can take up the entire display screen, and it’ll middle its kids each vertically and horizontally.
Nevertheless, you continue to want the enter textual content to broaden and take all of the area accessible. Add a weight worth to the already declared modifier in TextField. The modifier worth will seem like this:
modifier = Modifier.padding(finish = 16.dp).weight(1f)
This fashion, the enter discipline will take all of the accessible area on the road. How cool is that?!
Now, you have to create a Button with a significant search icon contained in the Row, proper under the TextField:
Button(onClick = { /* We'll take care of this later */}) {
    Icon(Icons.Outlined.Search, "Search")
}
As earlier than, add the subsequent import on the prime of the file:
import androidx.compose.materials.icons.outlined.Search
Lastly, you added Button! You now want to indicate this display screen inside major(). Open Most important.kt and change major() with the next code:
enjoyable major() = Window(
  title = "Sunny Desk",
  measurement = IntSize(800, 700),
) {
  val repository = Repository(API_KEY)

  MaterialTheme {
    WeatherScreen(repository)
  }
}
You simply gave a brand new title to your window and set a brand new measurement for it that can accommodate the UI you’ll construct later.
Construct and run to preview the change.
Subsequent, you’ll study a little bit of principle in regards to the LCE mannequin.
Loading, Content material, Error
Loading, Content material, Error, often known as LCE, is a paradigm that can allow you to obtain a unidirectional move of information in a easy means. Each phrase in its identify represents a state your UI might be in. You begin with Loading, which is all the time the primary state that your logic emits. Then, you run your operation and also you both transfer to a Content material state or an Error state, primarily based on the results of the operation.
Really feel like refreshing the info? Restart the cycle by going again to Loading after which both Content material or Error once more. The picture under illustrates this move.

To implement this in Kotlin, symbolize the accessible states with a sealed class. Create a brand new Lce.kt file within the SunnyDesk.major bundle and add the next code to it:
sealed class Lce<out T> {
  object Loading : Lce<Nothing>() // 1
  knowledge class Content material<T>(val knowledge: T) : Lce<T>() // 2
  knowledge class Error(val error: Throwable) : Lce<Nothing>() // 3
}
Right here’s a breakdown of this code:
1. Loading: Marks the beginning of the loading cycle. This case is dealt with with an object, because it doesn’t want to carry any further data.
2. Content material: Accommodates a chunk of information with a generic kind T you could show on the UI.
3. Error: Accommodates the exception that occurred as a way to resolve the best way to recuperate from it.
With this new paradigm, it’ll be tremendous simple to implement a pleasant UI in your customers!
Remodeling the Community Information
Earlier than you may dive into the UI, you have to get some knowledge. You’re already accustomed to the Repository that fetches climate updates from the backend, however these fashions aren’t appropriate in your UI simply but. It is advisable to remodel them into one thing that extra intently matches what your UI will symbolize.
As a primary step, as you already did earlier than, create a WeatherUIModels.kt file and add the next code in it:
knowledge class WeatherCard(
  val situation: String,
  val iconUrl: String,
  val temperature: Double,
  val feelsLike: Double,
  val chanceOfRain: Double? = null,
)

knowledge class WeatherResults(
  val currentWeather: WeatherCard,
  val forecast: Checklist<WeatherCard>,
)
WeatherCard represents a single forecast: You could have the anticipated climate situation with its icon for a visible illustration, the temperature and what the climate truly feels wish to individuals, and eventually, the prospect of rain.
WeatherResults incorporates all the varied climate studies in your UI: You’ll have a big card with the present climate, and a carousel of smaller playing cards that symbolize the forecast for the upcoming days.
Subsequent, you’ll remodel the fashions you get from the community into these new fashions which are simpler to show in your UI. Create a brand new Kotlin class and identify it WeatherTransformer.
Then, write code to extract the present climate situation from the response. Add this perform inside WeatherTransformer:
non-public enjoyable extractCurrentWeatherFrom(response: WeatherResponse): WeatherCard {
  return WeatherCard(
    situation = response.present.situation.textual content,
    iconUrl = "https:" + response.present.situation.icon.change("64x64", "128x128"),
    temperature = response.present.tempC,
    feelsLike = response.present.feelslikeC,
  )
}
With these traces, you’re mapping the fields in several objects of the response to a easy object that can have the info precisely how your UI expects it. As a substitute of studying nested values, you’ll have easy properties!
Sadly, the icon URL returned by the climate API isn’t an precise URL. One in all these values seems to be one thing like this:
//cdn.weatherapi.com/climate/64x64/day/116.png
To repair this, you prepend the HTTPS protocol and improve the scale of the icon, from 64×64 to 128×128. In any case, you’ll show the present climate on a bigger card!
Now, you have to extract the forecast knowledge from the response, which is able to take a bit extra work. Under extractCurrentWeatherFrom(), add the next features:
// 1
non-public enjoyable extractForecastWeatherFrom(response: WeatherResponse): Checklist<WeatherCard> {
  return response.forecast.forecastday.map { forecastDay ->
    WeatherCard(
      situation = forecastDay.day.situation.textual content,
      iconUrl = "https:" + forecastDay.day.situation.icon,
      temperature = forecastDay.day.avgtempC,
      feelsLike = avgFeelsLike(forecastDay),
      chanceOfRain = avgChanceOfRain(forecastDay),
    )
  }
}

// 2
non-public enjoyable avgFeelsLike(forecastDay: Forecastday): Double =
  forecastDay.hour.map(Hour::feelslikeC).common()
non-public enjoyable avgChanceOfRain(forecastDay: Forecastday): Double =
  forecastDay.hour.map(Hour::chanceOfRain).common()
Right here’s a step-by-step breakdown of this code:
- The very first thing you have to do is loop via every of the nested forecast objects, as a way to map them every to a
WeatherCard, just like what you probably did for the present climate mannequin. This time, the response represents each the sensation of the climate and the prospect of rain as arrays, containing the hourly forecasts for these values. - For every hour, take the info you want (both the felt temperature or the prospect of rain) and calculate the common throughout the entire day. This offers you an approximation you may present on the UI.
With these features ready, now you can create a perform that returns the right mannequin anticipated by your UI. On the finish of WeatherTransformer, add this perform:
enjoyable remodel(response: WeatherResponse): WeatherResults {
  val present = extractCurrentWeatherFrom(response)
  val forecast = extractForecastWeatherFrom(response)

  return WeatherResults(
    currentWeather = present,
    forecast = forecast,
  )
}
Your knowledge transformation code is prepared! Time to place it into motion.
Updating the Repository
Open Repository.kt and alter the visibility of getWeatherForCity() to non-public:
non-public droop enjoyable getWeatherForCity(metropolis: String) : WeatherResponse = ...
As a substitute of calling this methodology instantly, you’re going to wrap it in a brand new one in order that it returns your new fashions.
Inside Repository, create a property that incorporates a WeatherTransformer:
non-public val transformer = WeatherTransformer()
Now, add this new perform under the property:
droop enjoyable weatherForCity(metropolis: String): Lce<WeatherResults> {
  return attempt {
    val consequence = getWeatherForCity(metropolis)
    val content material = transformer.remodel(consequence)
    Lce.Content material(content material)
  } catch (e: Exception) {
    e.printStackTrace()
    Lce.Error(e)
  }
}
On this methodology, you get the climate, and you utilize the transformer to transform it right into a WeatherResult and wrap it inside Lce.Content material. In case one thing goes terribly unsuitable through the community name, you wrap the exception into Lce.Error.
If you need an outline of how you could possibly check a repository like this one, written with Ktor, have a look at RepositoryTest.kt within the remaining mission. It makes use of Ktor’s MockEngine to drive an offline check.
Displaying the Loading State
Now you already know all the pieces in regards to the LCE sample, and also you’re prepared to use these ideas in a real-world utility, aren’t you? Good!
Open WeatherScreen.kt, and under WeatherScreen(), add this perform:
@Composable
enjoyable LoadingUI() {
  Field(modifier = Modifier.fillMaxSize()) {
    CircularProgressIndicator(
      modifier = Modifier
        .align(alignment = Alignment.Middle)
        .defaultMinSize(minWidth = 96.dp, minHeight = 96.dp)
    )
  }
}
What occurs right here is the illustration of the loading UI — nothing extra, nothing much less.
Now, you wish to show this loading UI under the enter parts. In WeatherScreen(), wrap the prevailing Row right into a vertical Column and name LoadingUI() under it within the following means:
Column(horizontalAlignment = Alignment.CenterHorizontally) {
  Row(...) { ... } // Your current enter code
  LoadingUI()
}
Construct and run, and also you’ll see a spinner.

You’ve obtained the loading UI up and working, however you additionally want to indicate the outcomes, which you’ll do subsequent.
Displaying the Outcomes
The very first thing you have to do is declare a UI for the content material as a perform inside WeatherScreen:
@Composable
enjoyable ContentUI(knowledge: WeatherResults) {
}
You’ll deal with the true UI later, however for the second, you want a placeholder. :]
Subsequent, on the prime of WeatherScreen(), you have to declare a few values under the prevailing queriedCity:
// 1
var weatherState by keep in mind { mutableStateOf<Lce<WeatherResults>?>(null) }
// 2
val scope = rememberCoroutineScope()
Within the code above:
-
weatherStatewill maintain the present state to show. Each time the LCE adjustments, Compose will recompose your UI as a way to react to this alteration. - You want the
scopeto launch a coroutine from aComposable.
Now, you have to implement the button’s onClick() (the one marked with the /* We'll take care of this later */ remark), like so:
onClick = {
    weatherState = Lce.Loading
    scope.launch {
      weatherState = repository.weatherForCity(queriedCity)
    }
  }
Each time you click on, weatherState adjustments to Loading, inflicting a recomposition. On the identical time, you’ll launch a request to get the up to date climate. When the consequence arrives, this may change weatherState once more, inflicting one other recomposition.
Then, add the required import:
import kotlinx.coroutines.launch
At this level, you have to deal with the recomposition, and you have to draw one thing completely different for every state. Go to the place you invoked LoadingUI on the finish of WeatherScreen(), and change that invocation with the next code:
when (val state = weatherState) {
 is Lce.Loading -> LoadingUI()
 is Lce.Error -> Unit
 is Lce.Content material -> ContentUI(state.knowledge)
}
With this code, each time a recomposition happens, you’ll be capable to draw a unique UI primarily based on the state.
The next move is downloading the picture for the climate situations. Sadly, there isn’t an API in Compose for Desktop for doing that simply but. Nevertheless, you may implement your personal resolution! Create a brand new file and identify it ImageDownloader.kt. Inside, add this code:
import androidx.compose.ui.graphics.ImageBitmap
import androidx.compose.ui.graphics.asImageBitmap
import io.ktor.consumer.*
import io.ktor.consumer.engine.cio.*
import io.ktor.consumer.request.*
import org.jetbrains.skija.Picture

object ImageDownloader {
  non-public val imageClient = HttpClient(CIO) // 1

  droop enjoyable downloadImage(url: String): ImageBitmap { // 2
    val picture = imageClient.get<ByteArray>(url)
    return Picture.makeFromEncoded(picture).asImageBitmap()
  }
}
Right here’s an outline of what this class does:
- The very first thing you may discover is that you simply’re creating a brand new
HttpClient: It’s because you don’t want all of the JSON-related configuration from the repository, and you actually solely want one consumer for all the photographs. -
downloadImage()downloads a useful resource from a URL and saves it as anarrayofbytes. Then, it makes use of a few helper features to transform thearrayright into abitmap, which is able to use in your Compose UI.
Now, return to WeatherScreen.kt, discover ContentUI() and add this code to it:
var imageState by keep in mind { mutableStateOf<ImageBitmap?>(null) }

LaunchedEffect(knowledge.currentWeather.iconUrl) {
  imageState = ImageDownloader.downloadImage(knowledge.currentWeather.iconUrl)
}
These traces will save the picture you downloaded right into a state in order that it survives recompositions. LaunchedEffect() will run the obtain of the picture solely when the primary recomposition happens. If you happen to didn’t use this, each time one thing else adjustments, your picture obtain would run once more, downloading unneeded knowledge and inflicting glitches within the UI.
Then, add the required import:
import androidx.compose.ui.graphics.ImageBitmap
On the finish of ContentUI(), add a title for the present climate:
Textual content(
  textual content = "Present climate",
  modifier = Modifier.padding(all = 16.dp),
  model = MaterialTheme.typography.h6,
)
Subsequent, you’ll create a Card that can host the info in regards to the present climate. Add this under the beforehand added Textual content:
Card(
  modifier = Modifier
    .fillMaxWidth()
    .padding(horizontal = 72.dp)
) {
  Column(
    modifier = Modifier.fillMaxWidth().padding(16.dp),
    horizontalAlignment = Alignment.CenterHorizontally,
  ) {
    Textual content(
      textual content = knowledge.currentWeather.situation,
      model = MaterialTheme.typography.h6,
    )

    imageState?.let { bitmap ->
      Picture(
        bitmap = bitmap,
        contentDescription = null,
        modifier = Modifier
          .defaultMinSize(minWidth = 128.dp, minHeight = 128.dp)
          .padding(prime = 8.dp)
      )
    }

    Textual content(
      textual content = "Temperature in °C: ${knowledge.currentWeather.temperature}",
      modifier = Modifier.padding(all = 8.dp),
    )
    Textual content(
      textual content = "Seems like: ${knowledge.currentWeather.feelsLike}",
      model = MaterialTheme.typography.caption,
    )
  }
}
Right here, you utilize a few Textual content parts to indicate the completely different values, and an Picture to indicate the icon, if that’s already accessible.
To make use of the code above, you have to import androidx.compose.basis.Picture.
Subsequent, add this code under Card:
Divider(
  coloration = MaterialTheme.colours.major,
  modifier = Modifier.padding(all = 16.dp),
)
This provides a easy divider between the present climate and the forecast you’ll implement within the subsequent step.
The final piece of content material you wish to show is the forecast climate. Right here, you’ll use yet one more title and a LazyRow to show the carousel of things, as you don’t know what number of of them will come again from the community request, and also you need it to be scrollable.
Add this code under the Divider:
Textual content(
  textual content = "Forecast",
  modifier = Modifier.padding(all = 16.dp),
  model = MaterialTheme.typography.h6,
)
LazyRow {
  objects(knowledge.forecast) { weatherCard ->
    ForecastUI(weatherCard)
  }
}
Add the lacking imports as effectively:
import androidx.compose.basis.lazy.LazyRow
import androidx.compose.basis.lazy.objects
At this level, you’ll discover the IDE complaining, however that’s anticipated, as you didn’t create ForecastUI() but. Go forward add this under ContentUI():
@Composable
enjoyable ForecastUI(weatherCard: WeatherCard) {
}
Right here, you declare the lacking perform. Inside, you should utilize the identical picture loading sample you used for the present climate’s icon:
var imageState by keep in mind { mutableStateOf<ImageBitmap?>(null) }

LaunchedEffect(weatherCard.iconUrl) {
  imageState = ImageDownloader.downloadImage(weatherCard.iconUrl)
}
As soon as once more, you’re downloading a picture, and it’s now time to indicate the UI for the remainder of the info inside your fashions. On the backside of ForecaseUI(), add the next:
Card(modifier = Modifier.padding(all = 4.dp)) {
  Column(
    modifier = Modifier.padding(8.dp),
    horizontalAlignment = Alignment.CenterHorizontally,
  ) {
    Textual content(
      textual content = weatherCard.situation,
      model = MaterialTheme.typography.h6
    )

    imageState?.let { bitmap ->
      Picture(
        bitmap = bitmap,
        contentDescription = null,
        modifier = Modifier
          .defaultMinSize(minWidth = 64.dp, minHeight = 64.dp)
          .padding(prime = 8.dp)
      )
    }

    val chanceOfRainText = String.format(
      "Probability of rain: %.2f%%", weatherCard.chanceOfRain
    )

    Textual content(
      textual content = chanceOfRainText,
      model = MaterialTheme.typography.caption,
    )
  }
}
That is once more just like displaying the present climate, however this time, you’ll additionally show the prospect of rain.
Construct and run. If you happen to seek for a legitimate metropolis identify, you’ll obtain a consequence like within the following picture.

Up to now, so good!
Displaying the Error State
The final element you have to implement is the UI for when all the pieces goes south. You’ll show an error message on this case. The app performs the search when a consumer presses the search button, so that you don’t actually need a retry choice.
Add this import on the prime of WeatherScreen.kt:
<code>androidx.compose.ui.textual content.model.TextAlign</code>
Now, add perform on the finish of WeatherScreen.kt:
@Composable
enjoyable ErrorUI() {
  Field(modifier = Modifier.fillMaxSize()) {
    Textual content(
      textual content = "One thing went unsuitable, attempt once more in a couple of minutes. ¯_(ツ)_/¯",
      modifier = Modifier
        .fillMaxSize()
        .padding(horizontal = 72.dp, vertical = 72.dp),
      textAlign = TextAlign.Middle,
      model = MaterialTheme.typography.h6,
      coloration = MaterialTheme.colours.error,
    )
  }
}
This code is including a Textual content that shows an error message when an error happens.
Now, you have to hyperlink this perform to the selection in WeatherScreen. Scroll as much as WeatherScreen() and discover the when assertion that handles the completely different states. Replace Error to indicate your newly added UI:
is Lce.Error -> ErrorUI()
You’re executed! Construct and run. Then, seek for a non-existent metropolis. You’ll see your error message popping up.
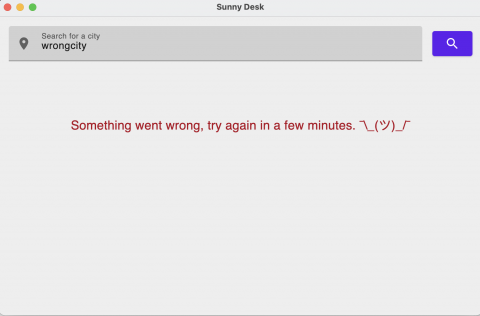
Observe: The Climate API returns your native climate if the textual content you entered is legitimate. For instance, once you enter “unsuitable metropolis”, it’ll show your locale, however when you use “wrongcity”, you’ll get the error message. So, when testing displaying the error, attempt to use some textual content that doesn’t make any sense. :].
Lastly, you’ll learn to publish your app.
Publishing Your App
Creating an app that leverages Compose for Desktop means you additionally get out-of-the-box Gradle duties to create packages of the app, primarily based on the working system. You possibly can run packageDmg to create a macOS installer, or run packageMsi to create an installer that runs on Home windows. You possibly can even create a .deb bundle with packageDeb.
This course of, although, has somewhat caveat hooked up. For the reason that packaging course of makes use of jpackage, you have to be working a minimal JDK model of 15. In any other case, the duties will fail.
The place to Go From Right here?
Obtain the finished mission recordsdata by tapping Obtain Supplies on the prime or backside of the tutorial.
Now you understand how to get began on Compose for Desktop, and you bought a glimpse of a few of the core components of constructing an app, like making community calls. On this tutorial, you used Ktor, which you’ll learn to use on Android within the Ktor: REST API for Cell tutorial.
Be certain that to additionally take a look at the Android Networking: Fundamentals video course for data on the best way to get began with Android networking, or comply with together with Android Networking With Kotlin Tutorial: Getting Began, which targets Kotlin particularly.
To study extra about coroutines, you may seize the Kotlin Coroutines by Tutorials e book, or learn Kotlin Coroutines Tutorial for Android: Getting Began.
Hopefully, you loved this tutorial. In case you have any questions or feedback, please be a part of the discussion board dialogue under!
[ad_2]